Candle Detection Tutorial
Editorial
To make applying some staff from Machine Learning in your app meaningful, you will need at first to extract some data from your model and then use it in some other place.

Needless to say that the vast majority of Computer Vision Neural Networks are used to provide positions, postures, or shapes of objects to create some beautiful AR experiences. Today we'll show you on a specific case how Object Detection CoreML model will work with ARKit.
Tutorial Overview
Once a friend of mine asked me how fast inference of a CoreML model will work alongside ARKit because both of these tasks are very resourceful. And I think, what could be the most simple case to reproduce which will involve both CoreML and ARKit.
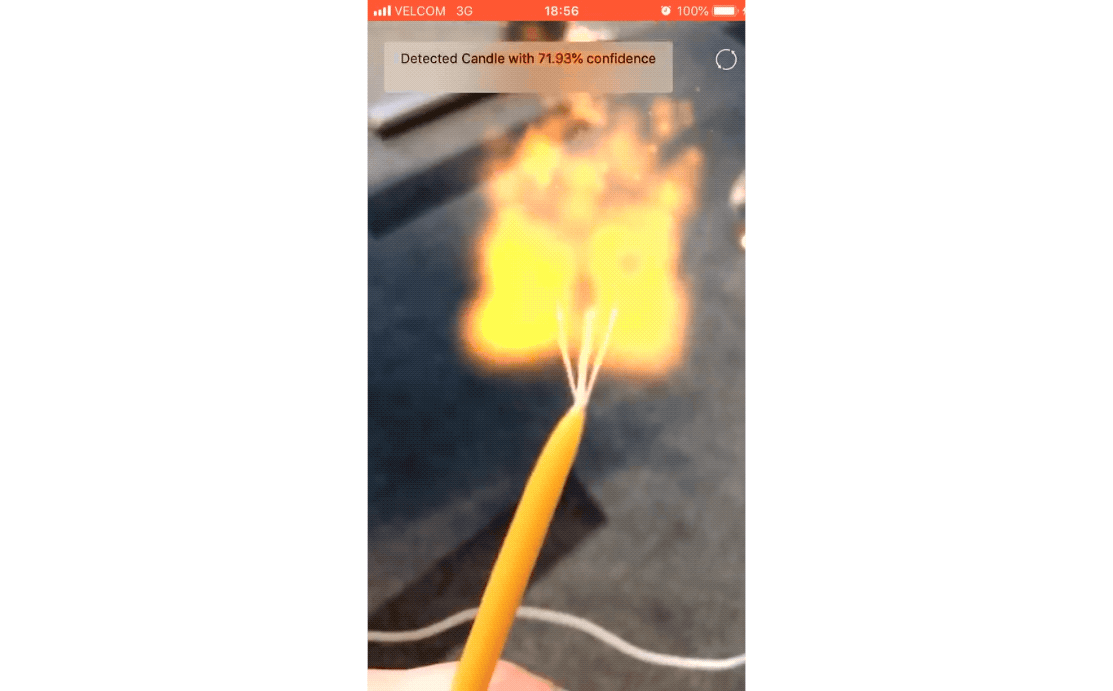
I have come up with the idea that the most straightforward case will be to train a model that will detect a candlewick, then using ARKit hittest we can catch a 3D position of the object in ARKit scene, and apply SKParticleEmitters of fire at this position. That's what we'll show you how to do in this tutorial.
Our example app was made using a couple of short videos of a candle, ARKit, and SpriteKit Particle Emitters:
Note: This model definitely has limitations. It can detect only one type of a candlewick, on one kind of a candle. But as you will see, creating datasets using videos of different candles won't take too much.
Creating Dataset: Images Preparation
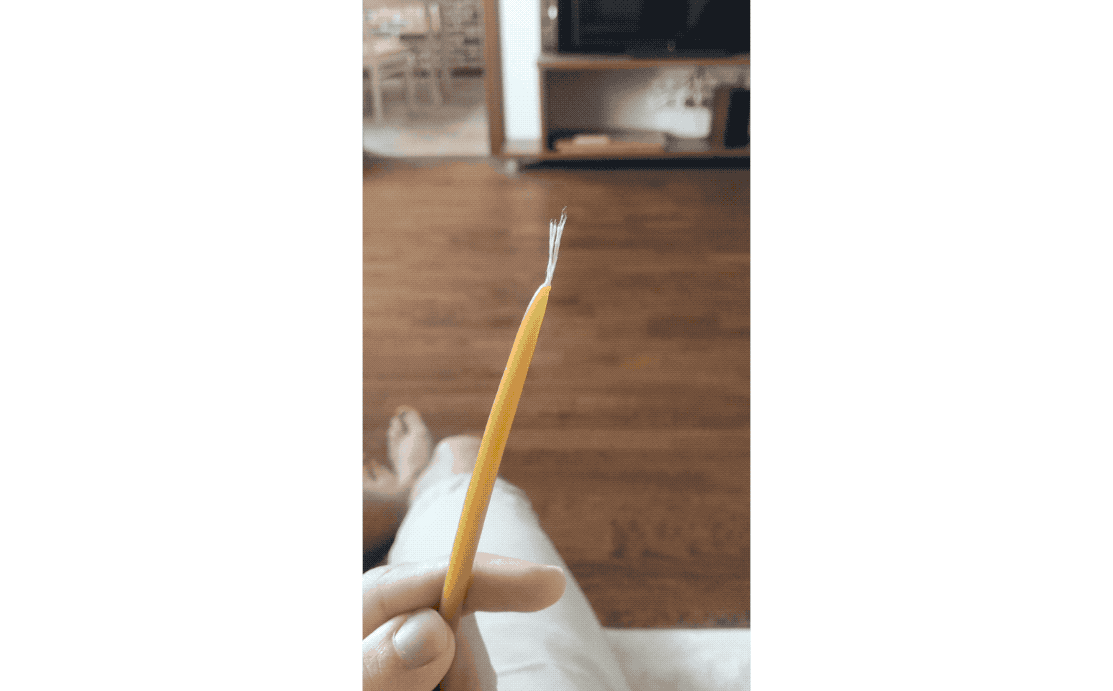
Obviously, I needed a candle to make a dataset. So next morning I headed to a church near me and bought one.
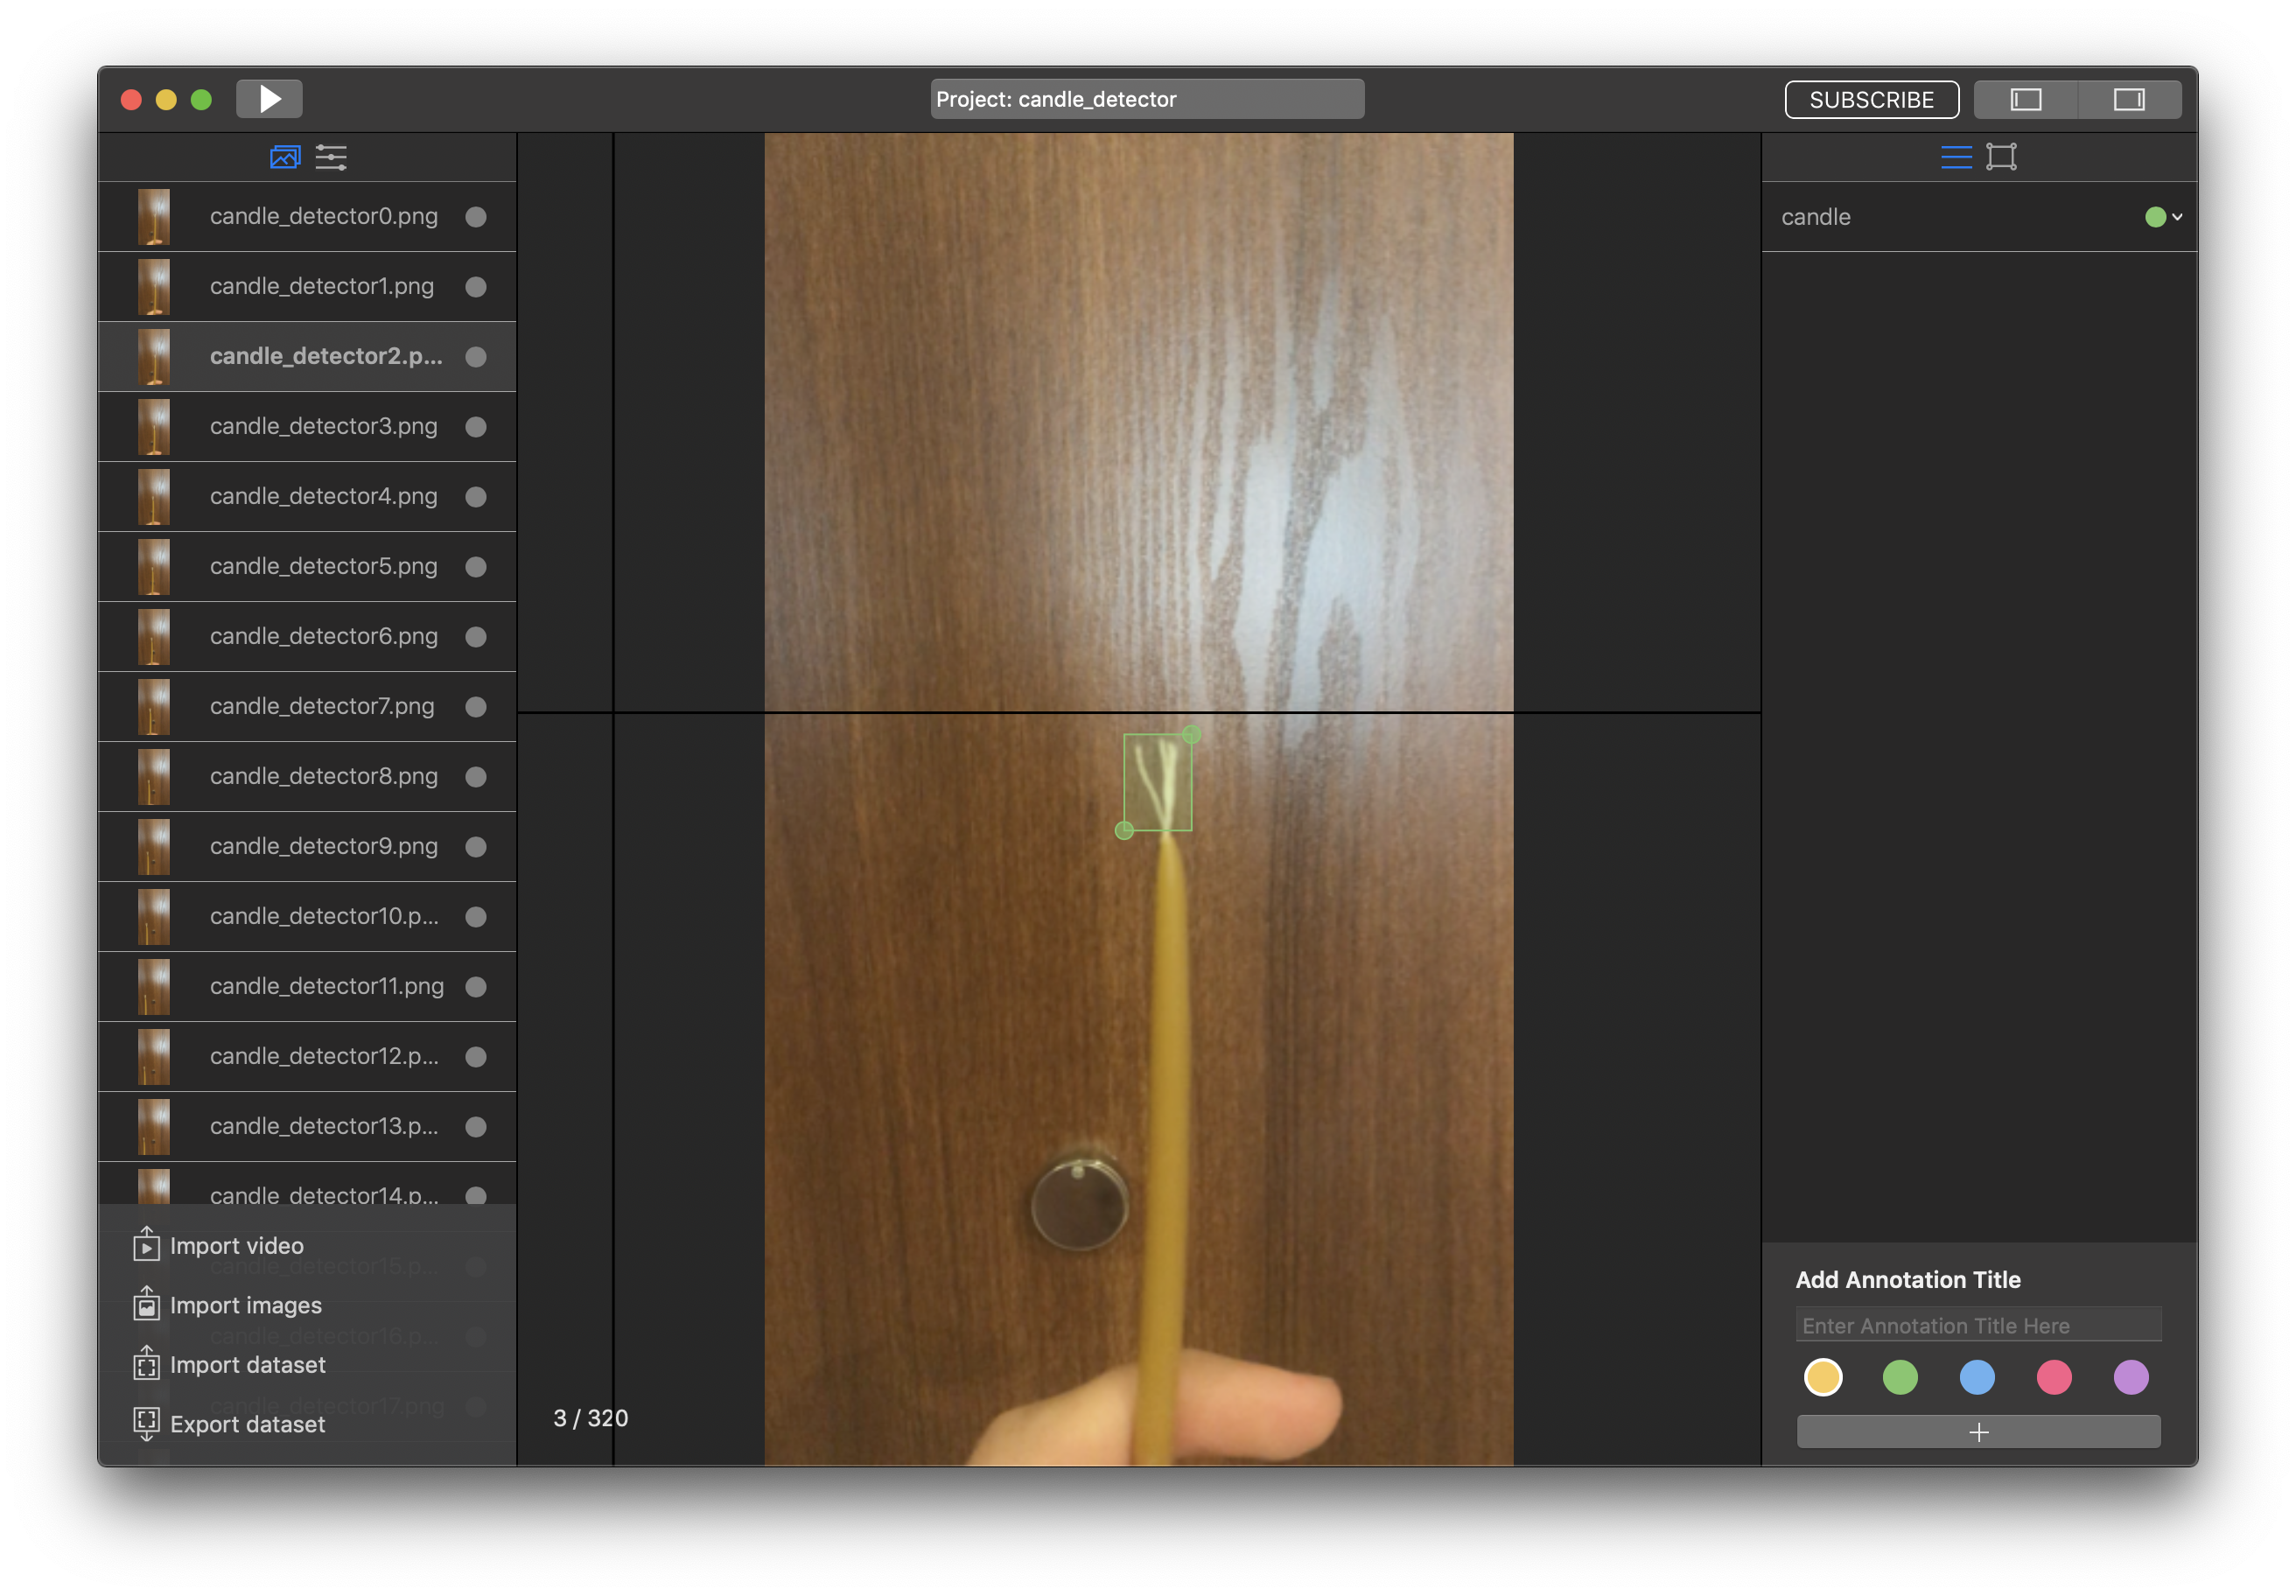
I have captured two videos of a candlewick, which allowed me to create a dataset of around 400 annotated images using MakeML's Automated Annotation tool. That was enough to train a model that detects a wick of a candle. Here are the videos that I've captured:
Creating Dataset: Images Markup
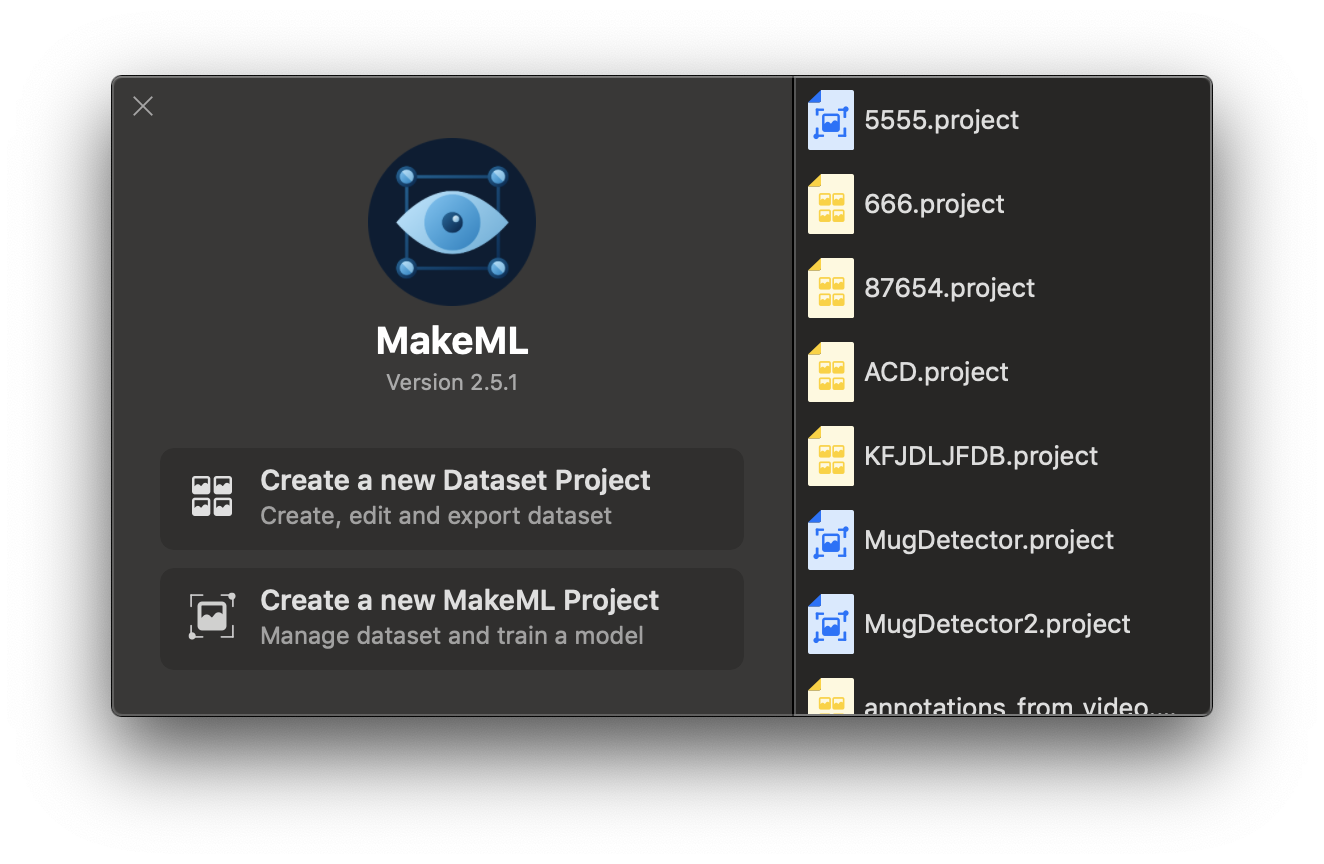
It took me a couple of minutes to capture these videos and to send them to my Mac. Right now, we need to label them. To do this, we will use MakeML app:
- Open MakeML app and create a new MakeML project.
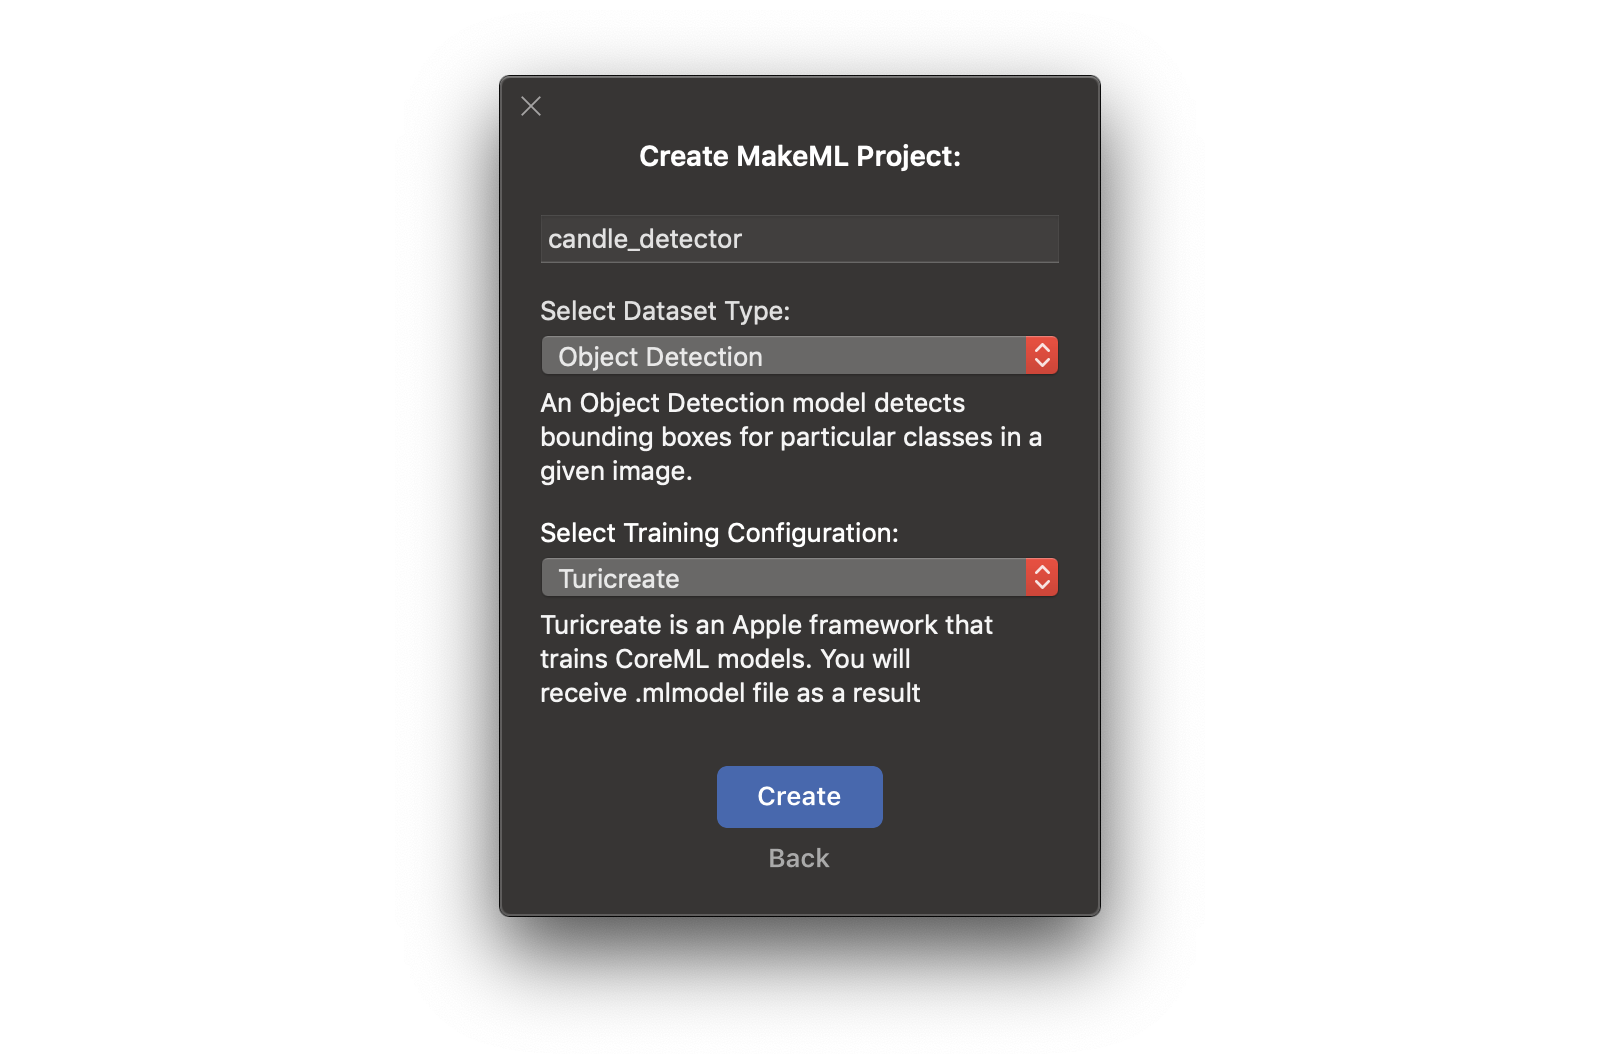
- Select Object Detection dataset type and Turicreate (in this tutorial I was using Turicreate, but you can also select Tensorflow) training configuration, enter a name for the project and press the "Create" button.
- Press the "Import Video" button in the images pane and select a video with a candlewick.
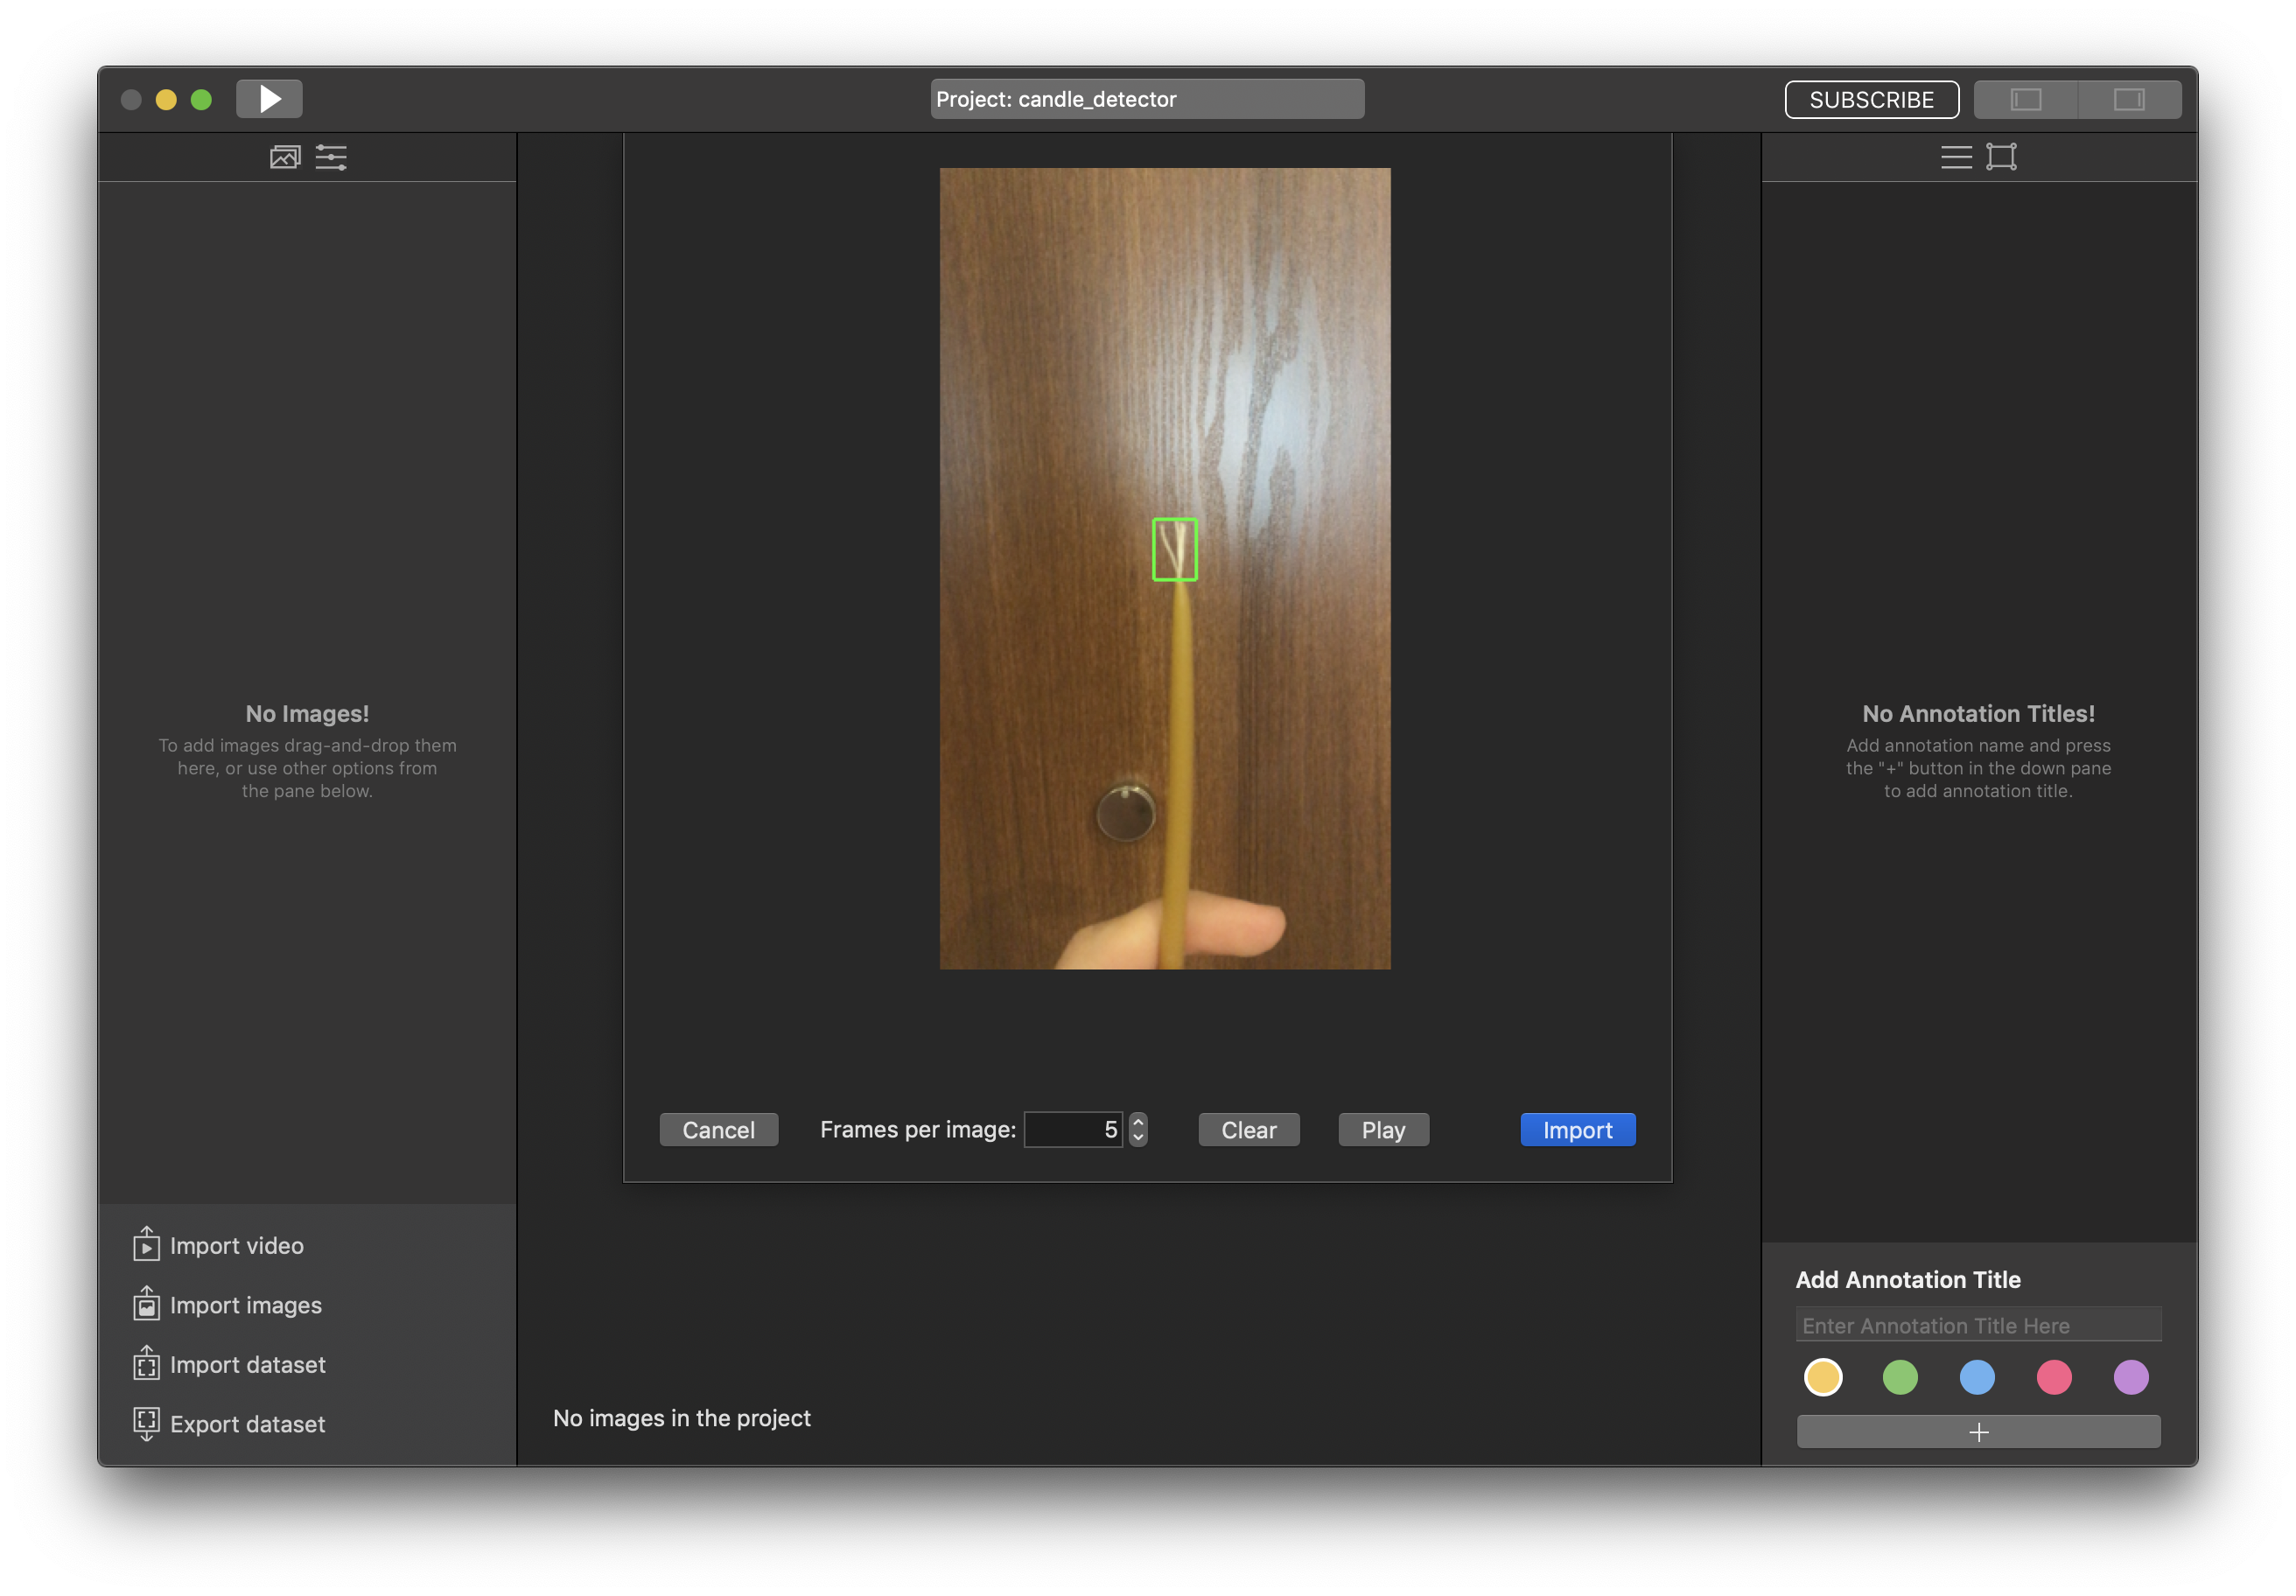
- To annotate our candle, we need to tap and drag over it's candlewick on the first frame, enter the annotation title (candle in my case), then press ok, set the number of images per frame, and press the import button. The video will be automatically annotated, and labeled images will be added to your project:
Because we have chosen a Turicreate training configuration, we don't need to set training parameters here - Apple's framework will do this automatically for us.
To start training, you need to press the "Run" button.
Training
After you have pressed the "Run" button, the app uploads to MakeML servers and training of the model starts. Here you need to wait until your model is ready and monitor one parameter that shows how good the training process is going. This parameter is Loss. In the latest version of MakeML (2.5.1) we have added a graph of Loss, so if you see that Loss value is going down - everything is ok. I have explained what this parameter means a bit deeper in the Nails tutorial.
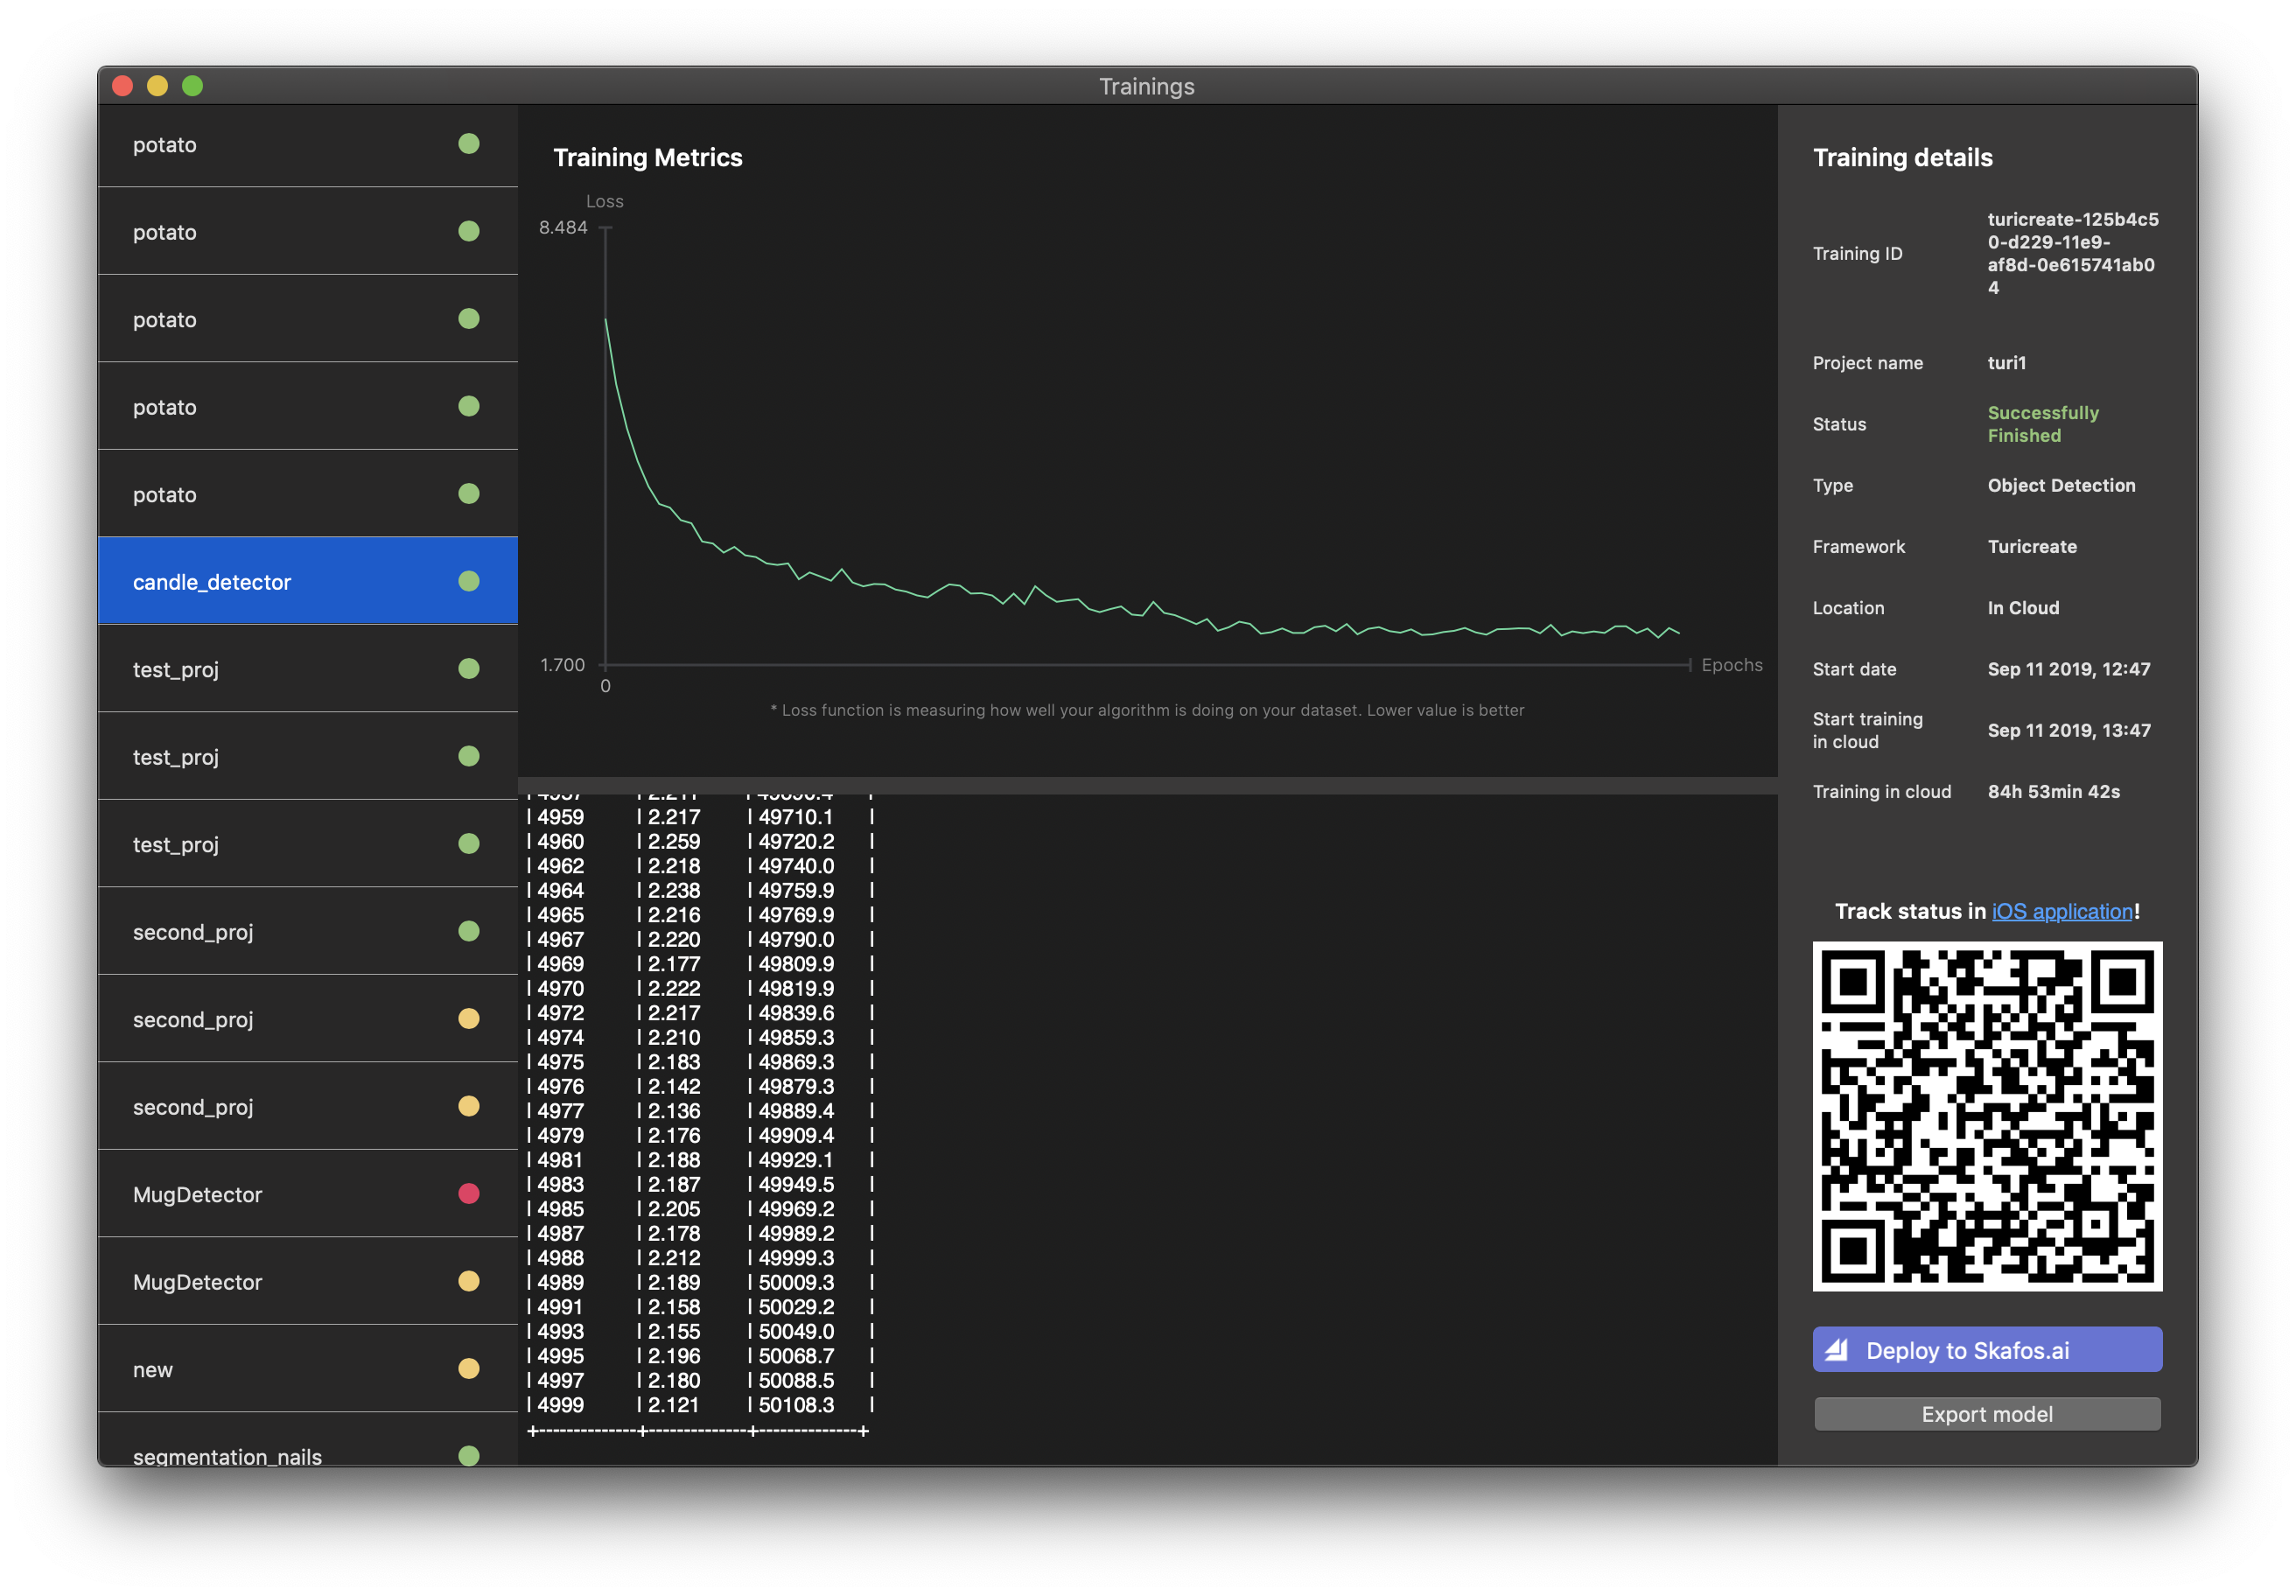
When the training of the model is finished, you can export it and receive a CoreML's "model.mlmodel" file, which is ready for integration into your iOS app. All you need is to press the "Export model" button.