Road Signs Detection + OCR Tutorial
Editorial
The greatest Computer Vision accomplishment achieved in the 2010s was undoubtedly self-driving cars. Although they are currently not permitted to be driven by themselves on public roads in any country due to the ethical issues. It is clear though that in the majority of traffic cases Tesla autopilot will outperform an average driver behind the wheel.
To create a legit autopilot the accurate understanding of a particular car surroundings would be the greatest challenge. The greatest challenge in creating a legit autopilot is the accurate understanding of the surroundings of a particular car. Given an engineer has all the data about the road shape, road signs, traffic lights, surrounding vehicles, their trajectories, and speed, it will become an easy task for the one to give a car proper directions in the vast majority of traffic cases.
Tutorial Overview
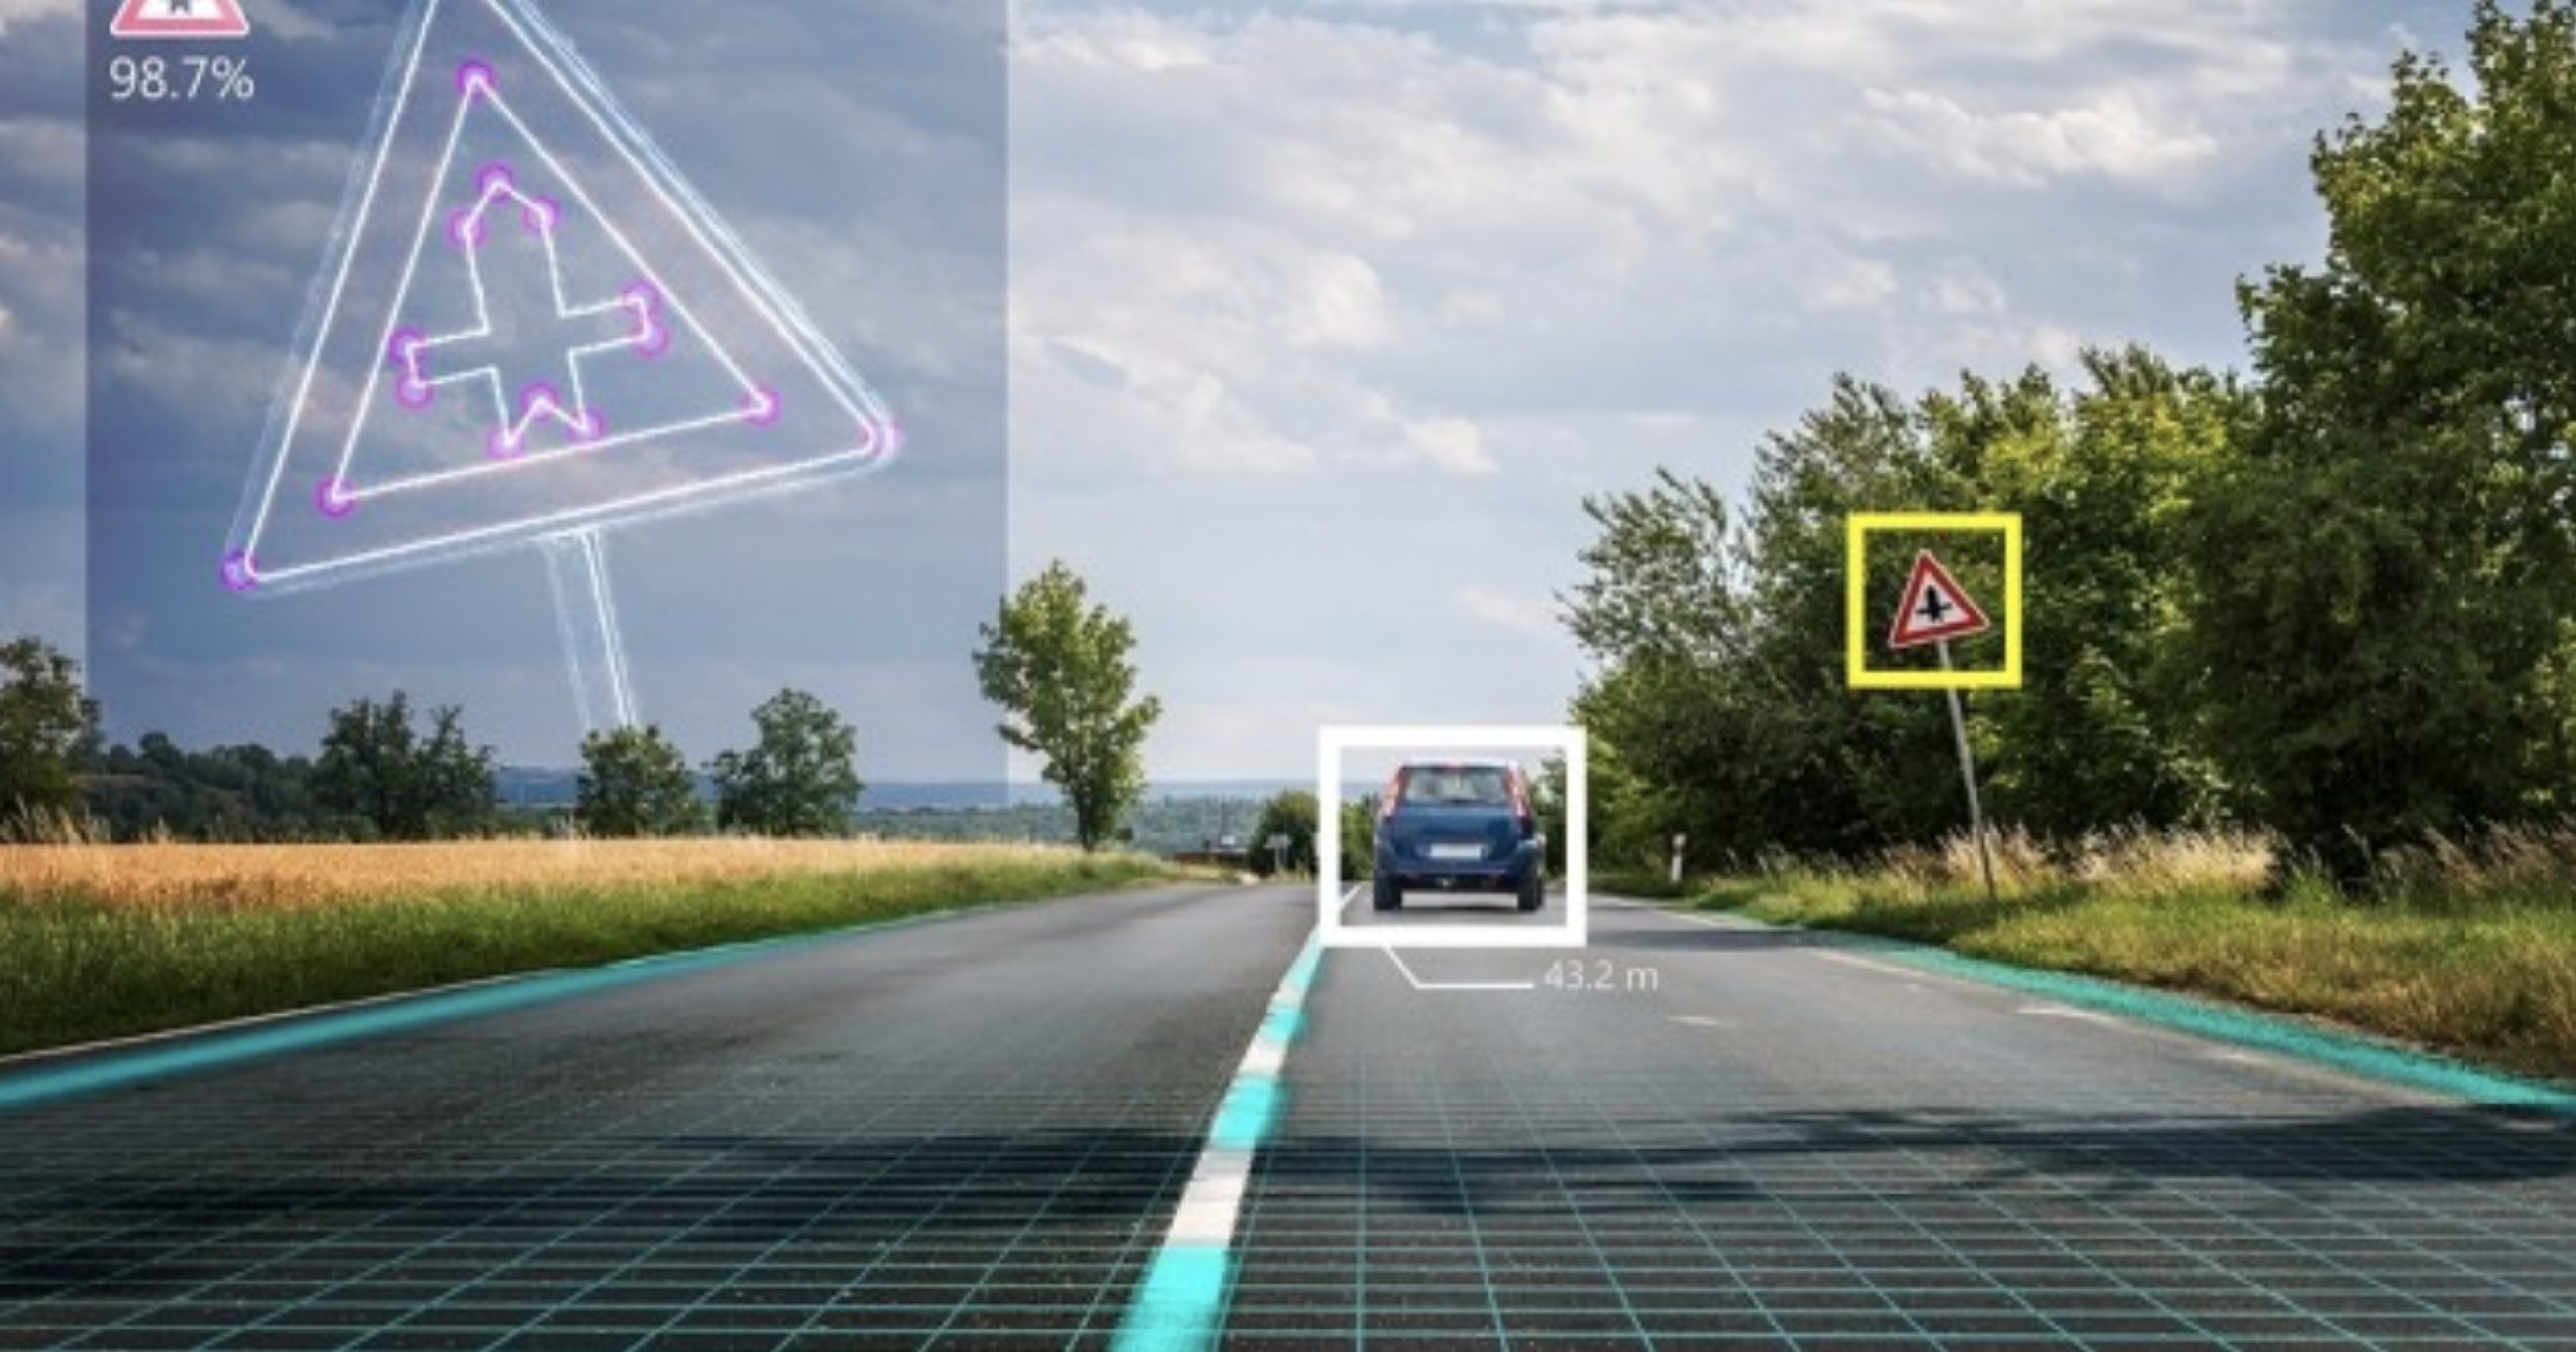
Early in the 2010s, car manufacturers began to install front cameras into their vehicles to monitor and analyze the surroundings of a car. For instance, to detect whether a car should enable high beam headlights or to measure the distance to the next vehicle so that the brakes are used automatically. Also, they used those cameras to recognize the road signs and have them displayed on the dashboard.
With road signs detection being the crucial part of road environment understanding, we are about to show you in this tutorial how to train a model to detect the "Stop" sign, traffic lights, the "Pedestrian Crossing" sign, and speed limits. We will show you how many images you need to collect, what augmentation parameters need to be applied, and what techniques are to be used to train a production-ready model detecting road signs.
NOTE: In this tutorial, I won't concentrate on MakeML images import and dataset annotation. You can check ’’information on” how to do it in other Object Detection tutorials (soccer ball detection tutorial, face anonymizer tutorial) as well as in MakeML documentation. Instead of that, I will elaborate on the data influence on a model performance and how we can improve results of our model using augmentation, as well as elaborate on removing dataset soft spots by means of collecting more images, and cleaning up the dataset. Press here for the final dataset that I’ve used for the project.
First attempt
Data collection is the most time-consuming part in almost every Computer Vision solution. Humankind nature is to be lazy, thus I always use the shortest cut possible. I wanted to create a Dataset with road signs and my first move was to go to unsplash.com where you can find free stock images that might be used for any purpose due to the fact, that they have no licence/due to not being licenced. I collected 191 images of 4 road sign types: Stop, Pedestrian Crossing, Traffic Lights and Speed Limit Signs. I also applied all the random crop augmentations into the dataset altogether with brightness +, brightness -, and contrast + augmentations. In this tutorial all the models are trained with Turicreate training configuration.
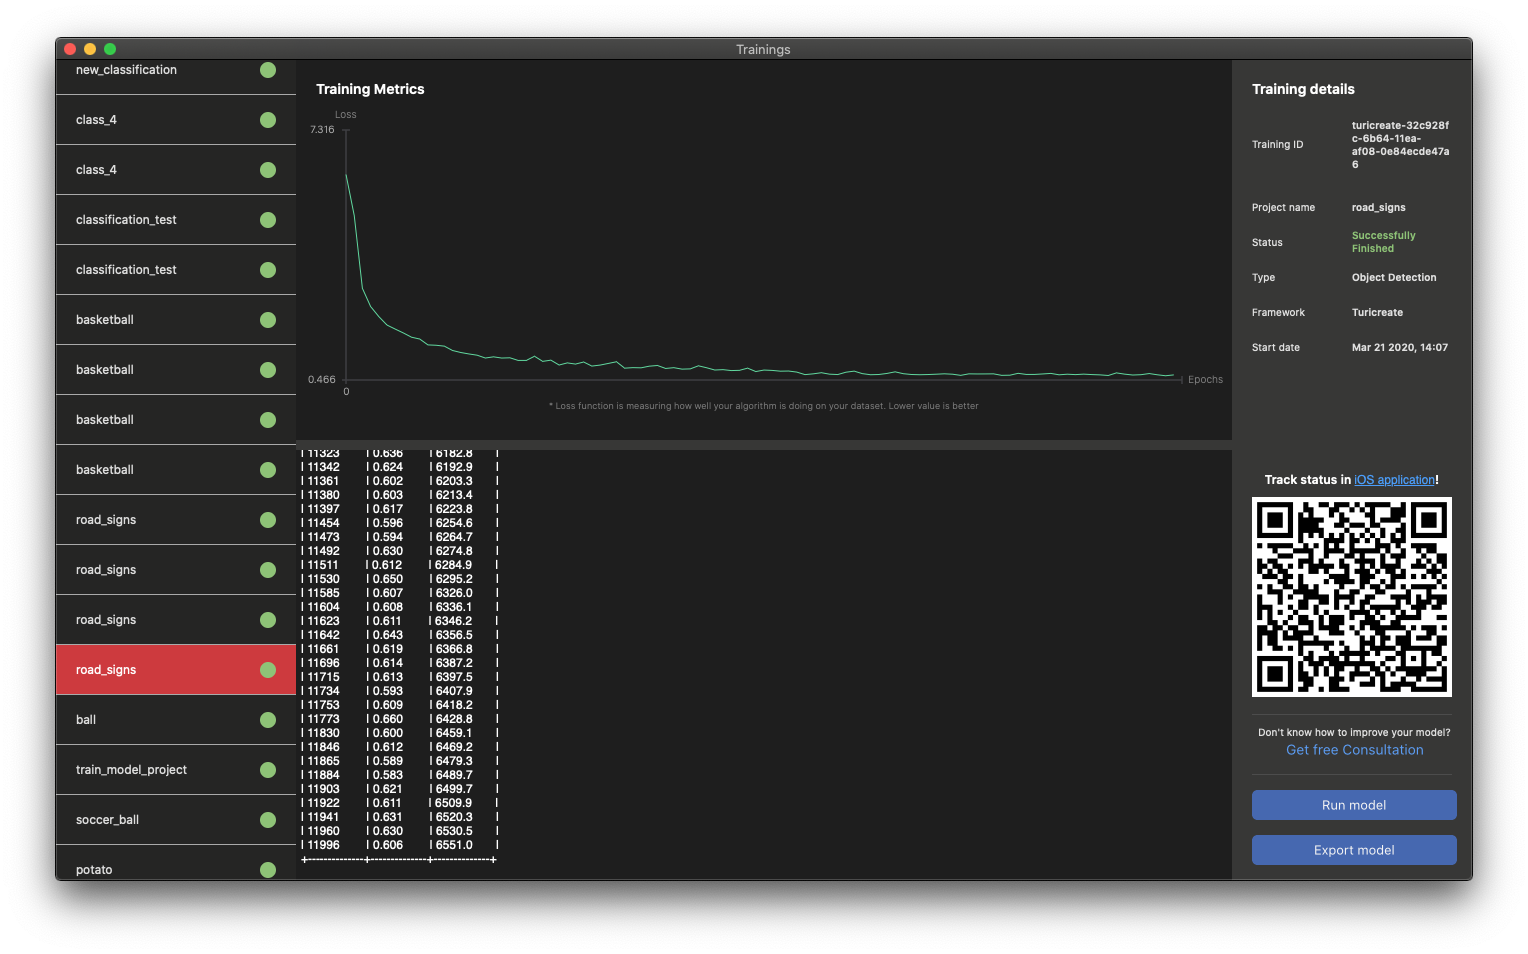
The 0.6 loss after 12000 iterations was quite a fair number, yet unfortunately the model was not good enough to work in real world surroundings.

Second attempt
Following that I decided to add a few more shots from an iPhone camera to improve the trained model performance. So I went for a walk and took about 100 images of road signs within my stroll. After the images annotation there were 294 in the dataset. I applied the same augmentation parameters for this training as well as for the first one. After that I started the second CoreML model training using the following augmentation parameters: all random crop options, brightness +, brightness -, and contrast + augmentations.
After 16000 steps training the models had a loss of 0.59 at the latest stages which is less than 0.6, but it didn’t help a lot whatsoever :) Results about the real world signs needed a great deal of improvement.

Third Attempt
Thus I decided to collect images in more various situations and drive around to capture more road signs for my dataset. I returned with about 130 more pictures which resulted in 414 total. Also I cleared around 10 images that were taken in the dark time from the Unsplash as they might be confusing for the model training and I’m not going to use this demo app at night. This time I tried all random crops, high brightness and low contrast augmentations since among the previous images there were a lot of dark ones as they were shot at night.
It took a few hours and 18000 iterations to train the model with this dataset. It had 0.54 loss, quite an improvement since the latest training of accuracy, yet still not enough of what I wanted. I needed the model to be accurate because while driving the signs might be passed rather fast and because the model we use doesn’t work in real time (depending on the model of the iPhone it gives up to 10-15 FPS) it has only several frames to detect a road sign correctly.

Fourth Attempt
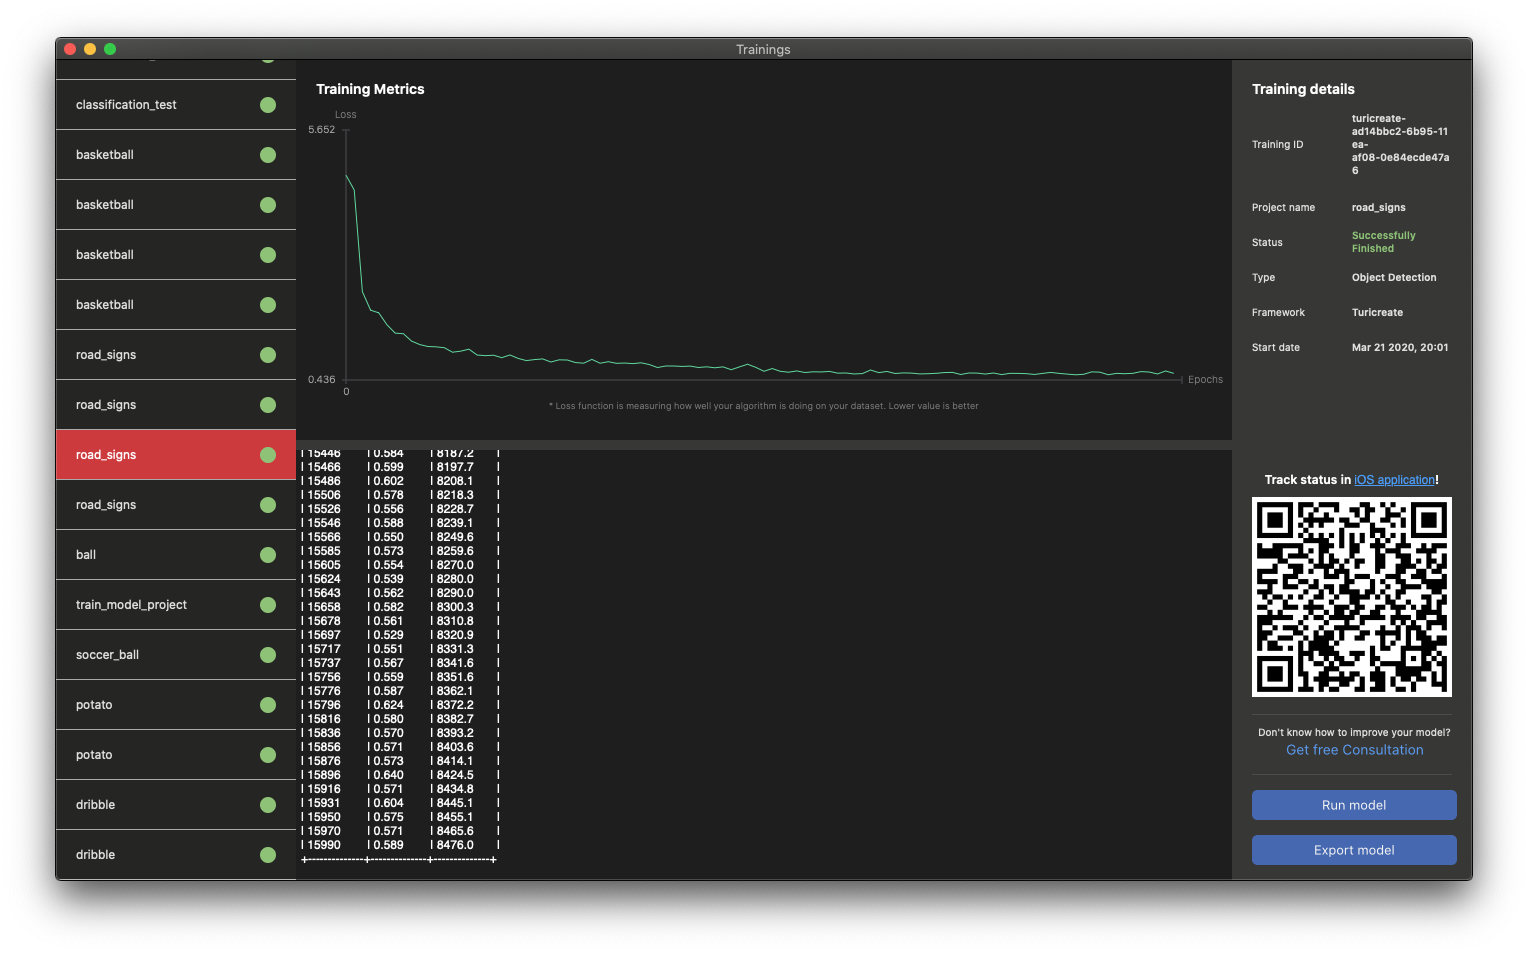
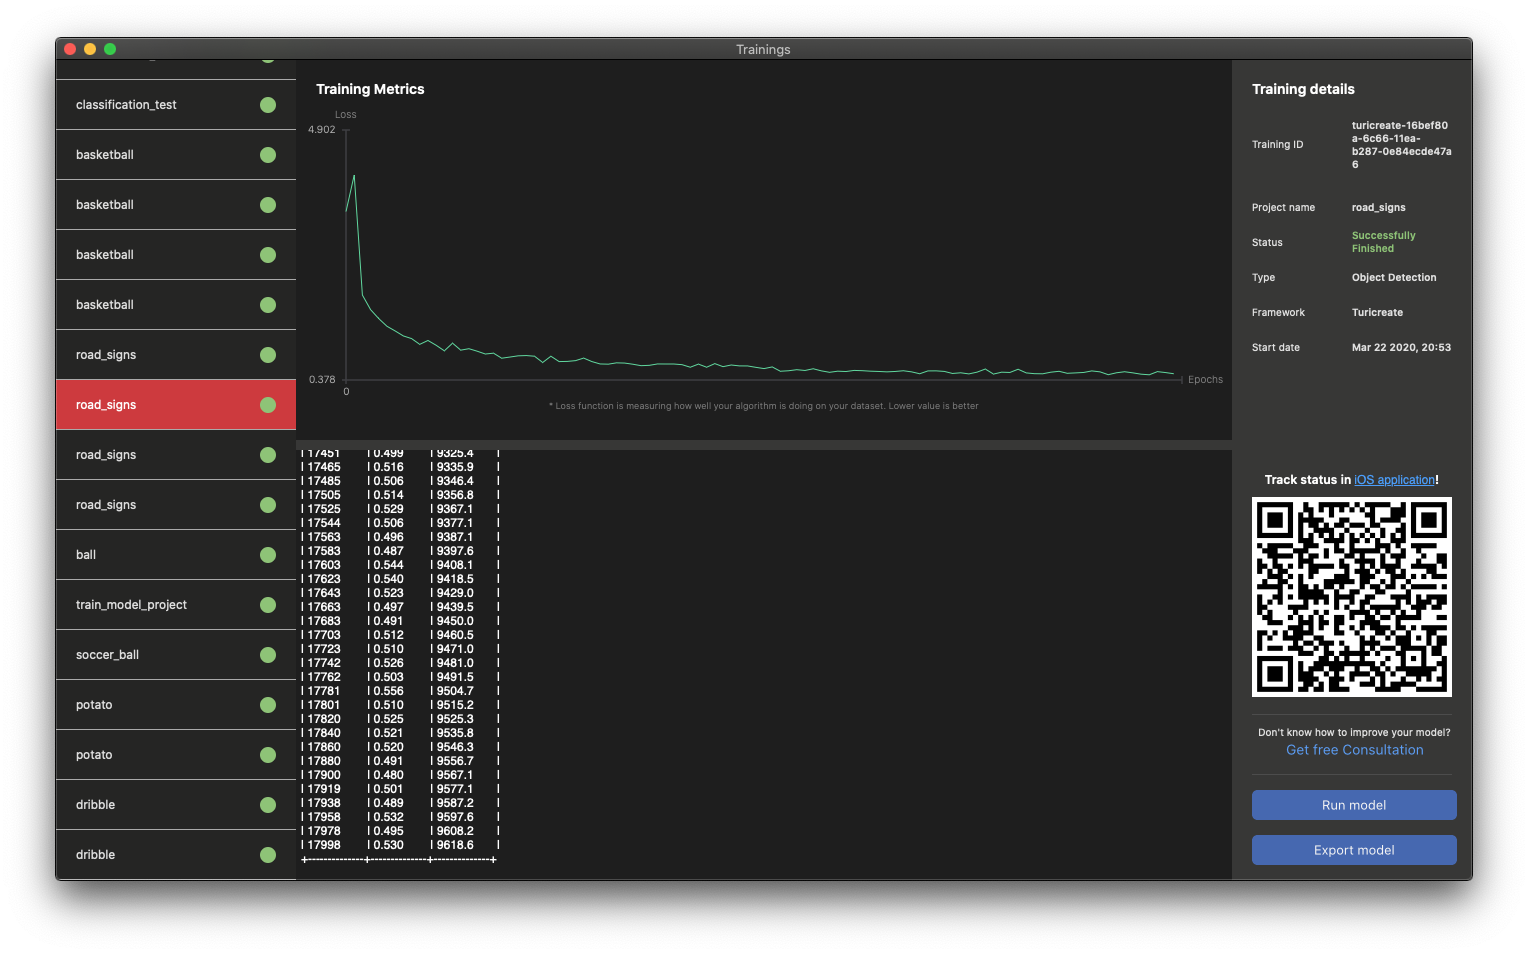
I asked a friend of mine to drive with me the next time, spending the next half of the day driving around and capturing as many road signs as possible, from different angles at different speed, resulting in 510 that time. We also cleared all stock images of road signs that looked kind of unorthodox - believe me, they were around 50 of them out of the initial 180, I guess photographers like something peculiar and it didn’t help that much our dataset to get better in terms of training the model for the real life. After annotation of the new images and cleaning up the dataset we got 877 images. This time I applied almost the same augmentation as for the previous training: all random crops, high contrast, high brightness. You can find the Object Detection dataset here.
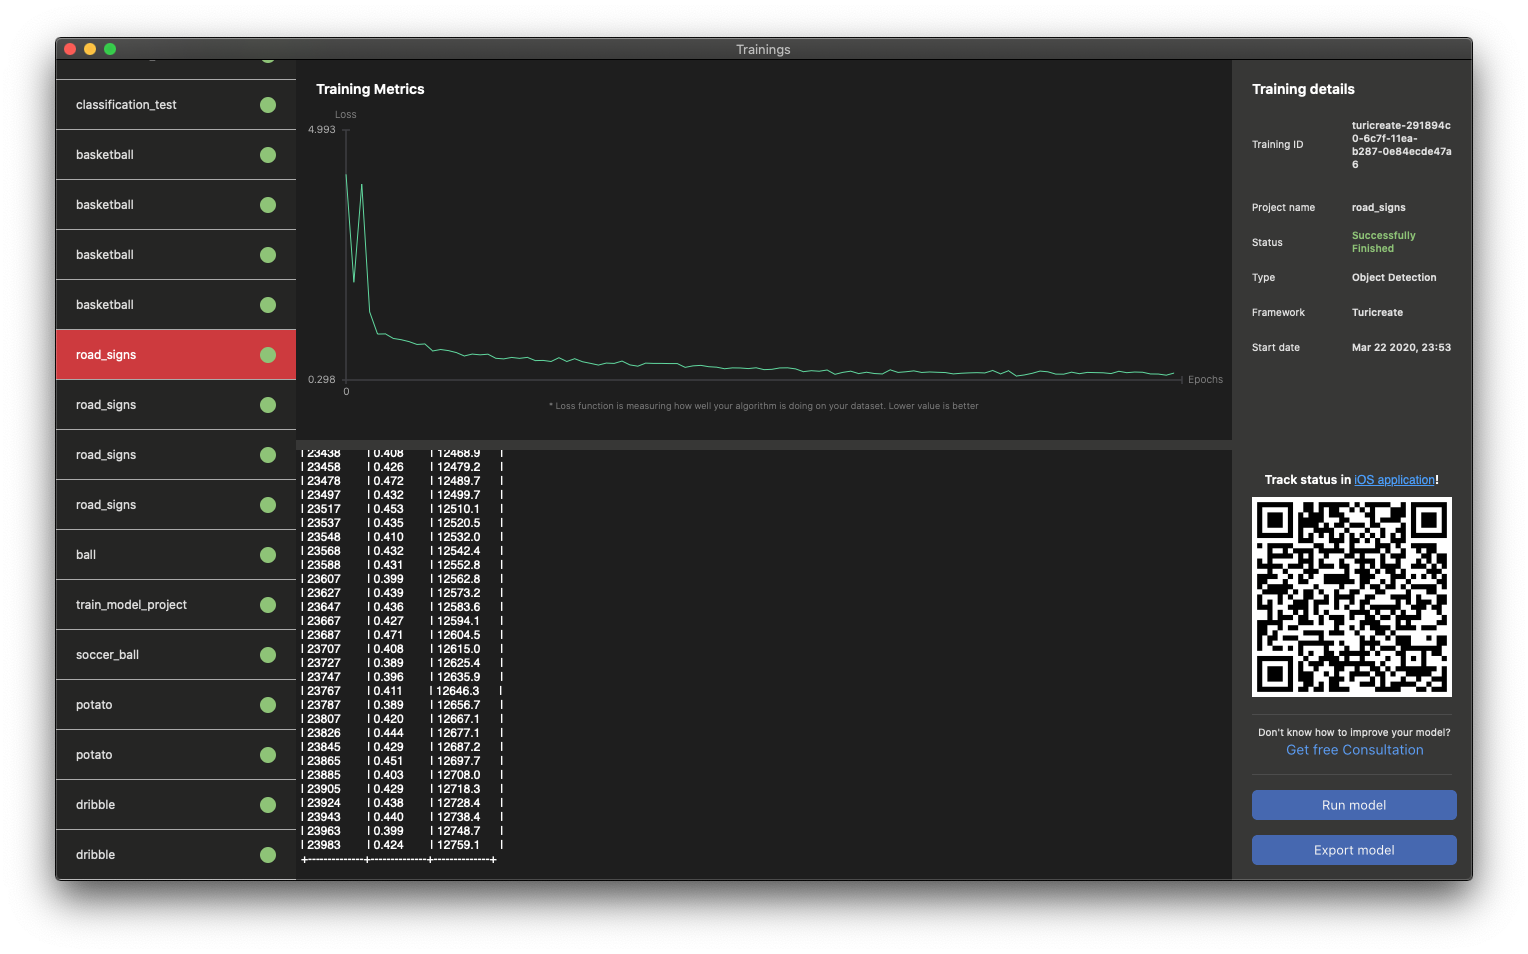
As a result I got a model that completed 24000 training iterations and had a 0.424 loss which came as a significant improvement in pure numbers. This model was also much better at detecting road signs in real world situations.
Model Integration
In the iOS project, we made something like a dashboard that shows a detected sign for 3 seconds - that was applied for three groups of signs - Traffic Light, Pedestrian Crossing, and Stop. We show the current speed limit and current speed on our dashboard as well. We also added logic to capture GPS location and detect current speed. We need it to show if the person is exceeding the speed limit or not. When the user starts to exceed the speed limit, we will show the current speed in red color.
Core Location + Current Speed
To retrieve current speed, we first need to Import the CoreLocation framework to our ViewController. Then we need to make a property of CLLocationManager like this let locationManager = CLLocationManager. And in the viewDidLoad method we need to add these three lines to start getting the location from our phone:
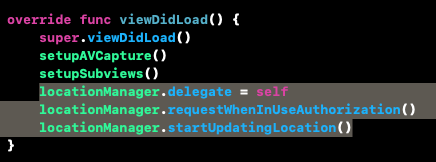
After that, we need to adapt our ViewController to CLLocationManagerDelegate.
We have done it in the following way:
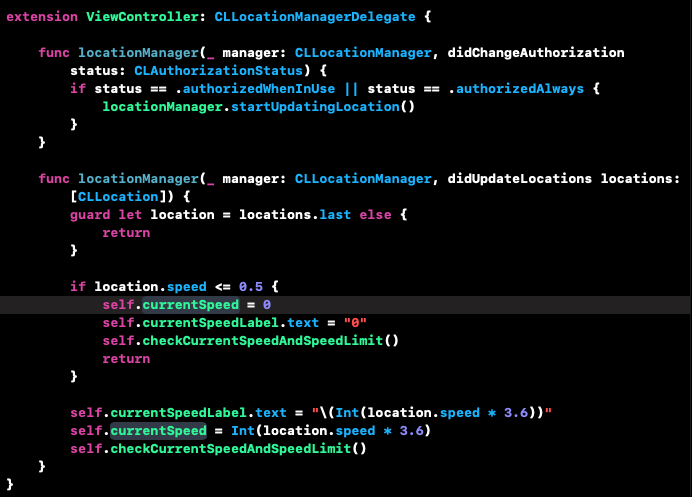
As you can see from the image above, we can get our current speed from func locationManager(_ manager: CLLocationManager, didUpdateLocations locations: [CLLocation]) method, by getting the computed variable from the last location.
Object Detection Neural Network + OCR
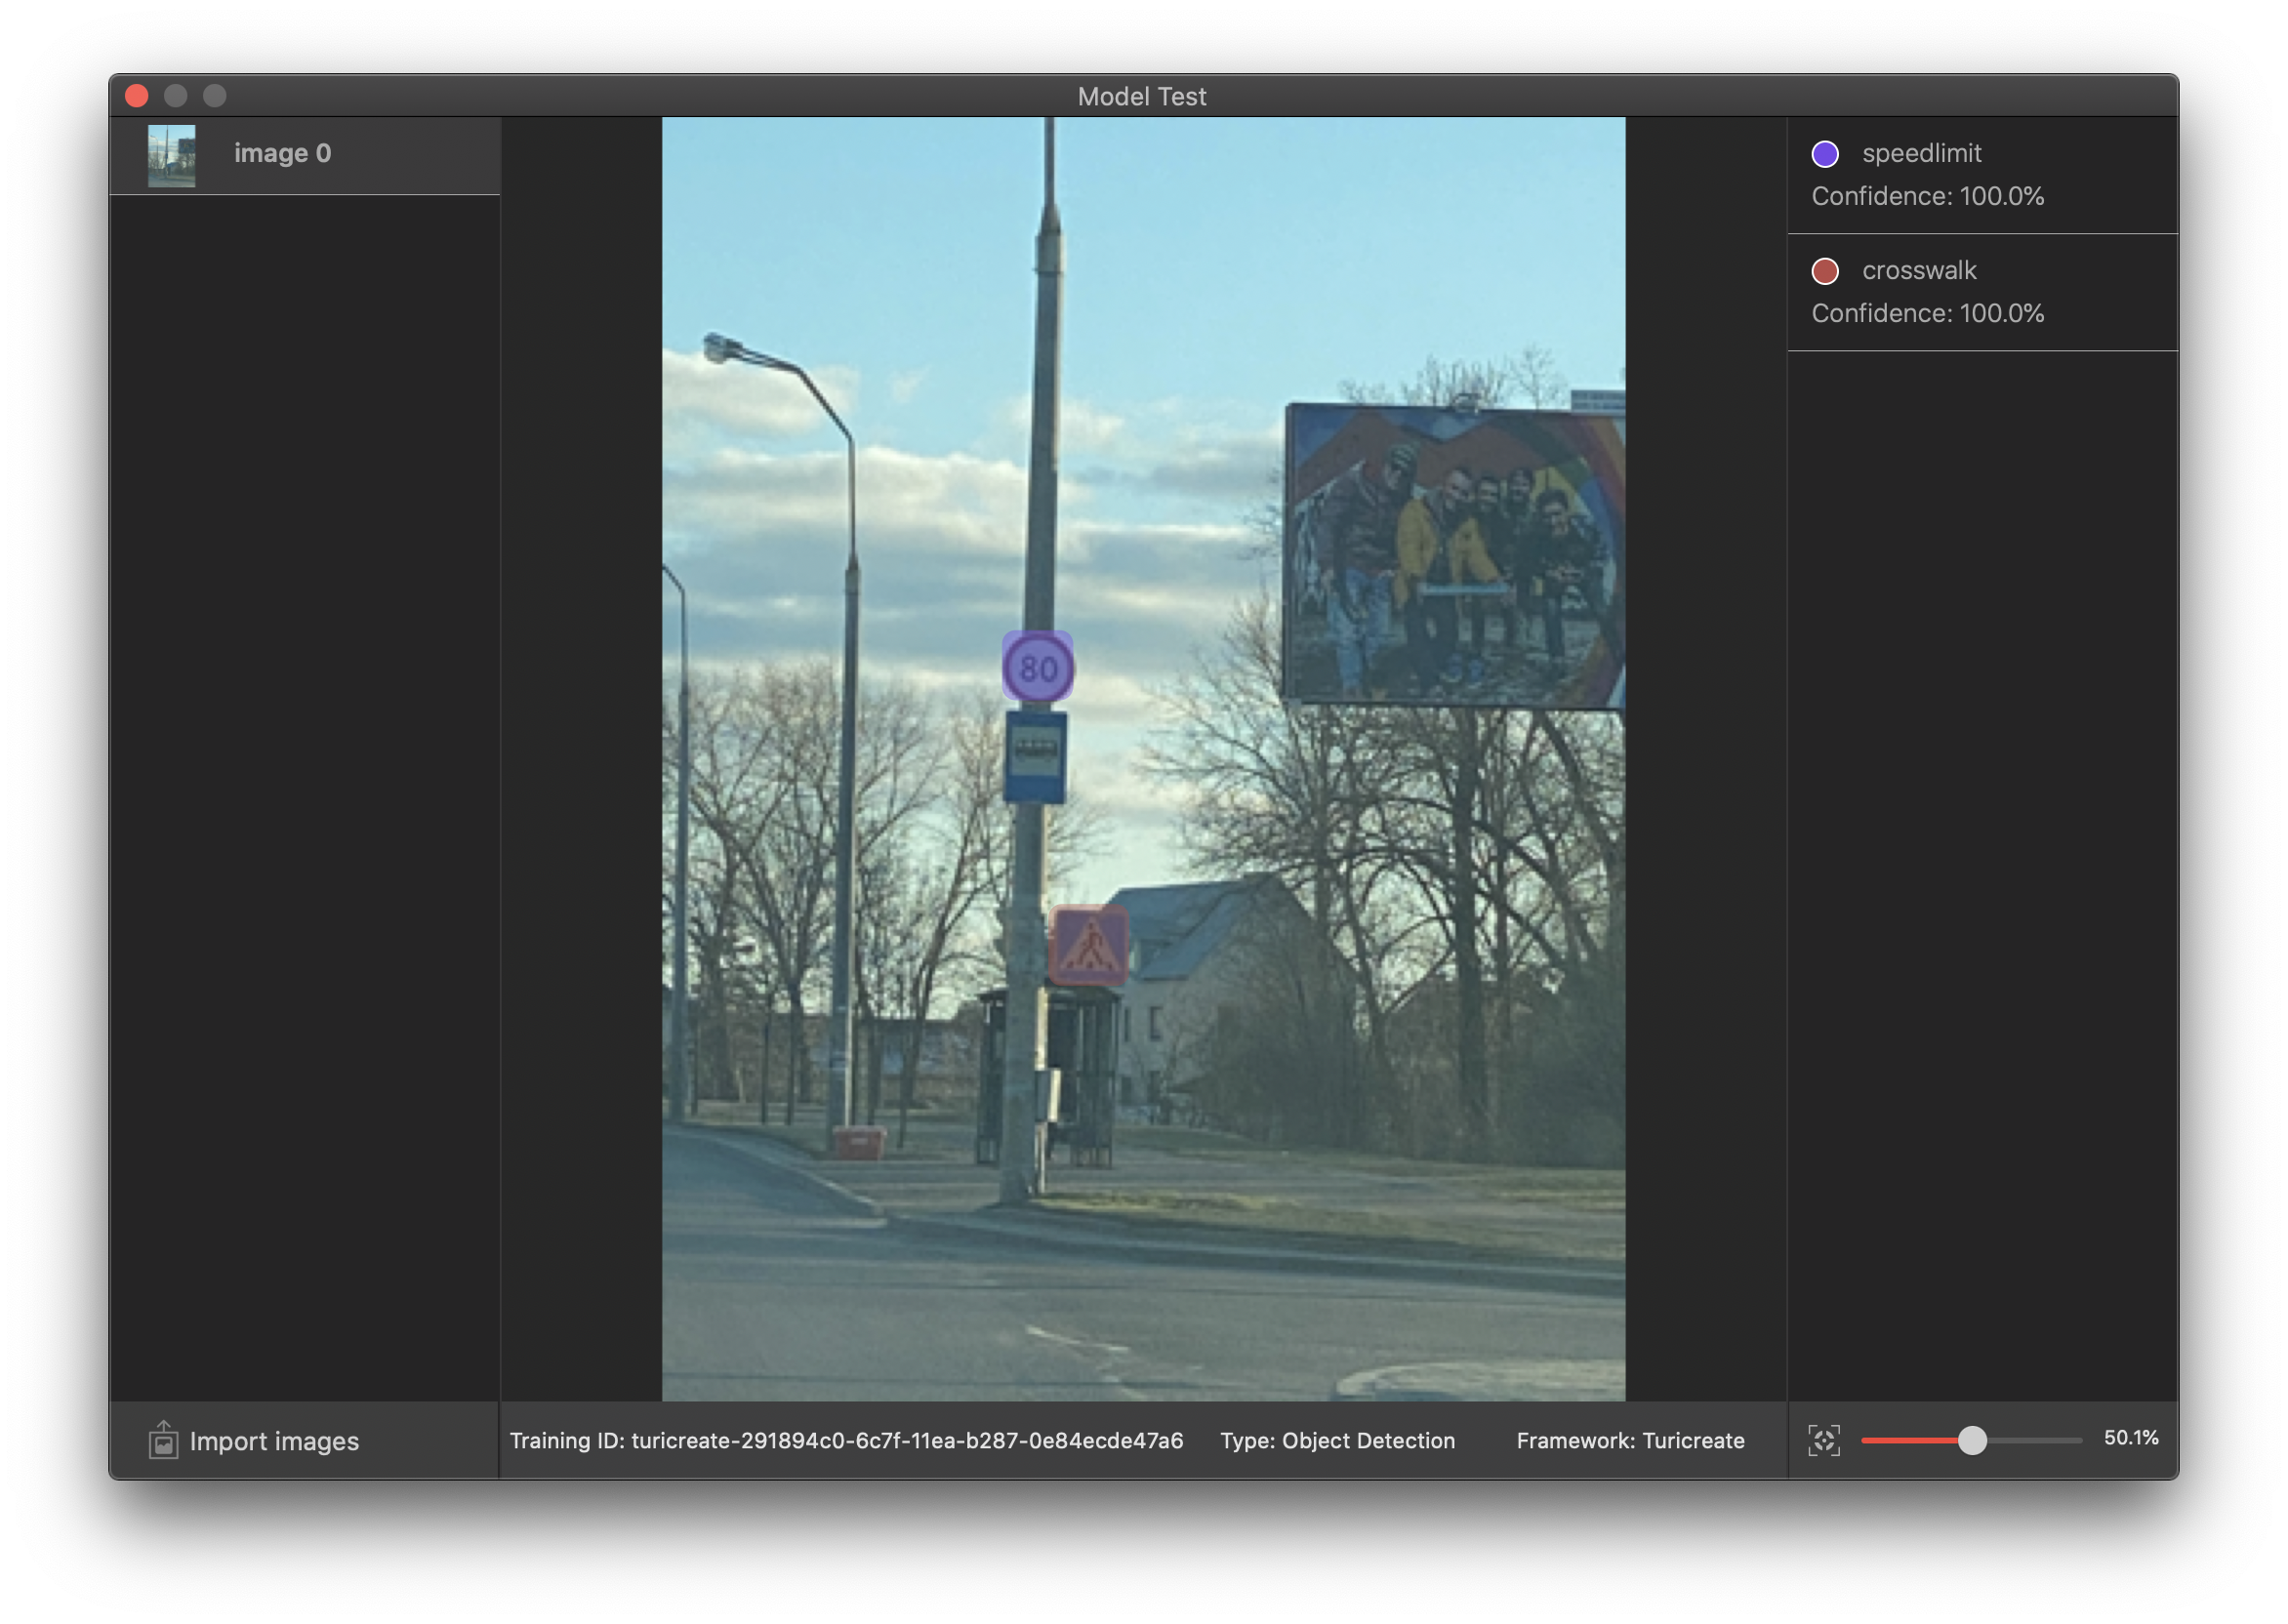
I suppose you have noticed that we were detecting speed limit signs as a class. So we can only understand whether there is a speed limit sign or not, we can't distinguish if it is 50km/h or 100km/h. So we need to retrieve this data from our speed limit signs. We use a framework called SwiftOCR for this purpose. OCR stands for Optical Character Recognition, this technology matured during the 2000s, so right now we can take a state-of-the-art solution and use it to retrieve numbers from the signs.
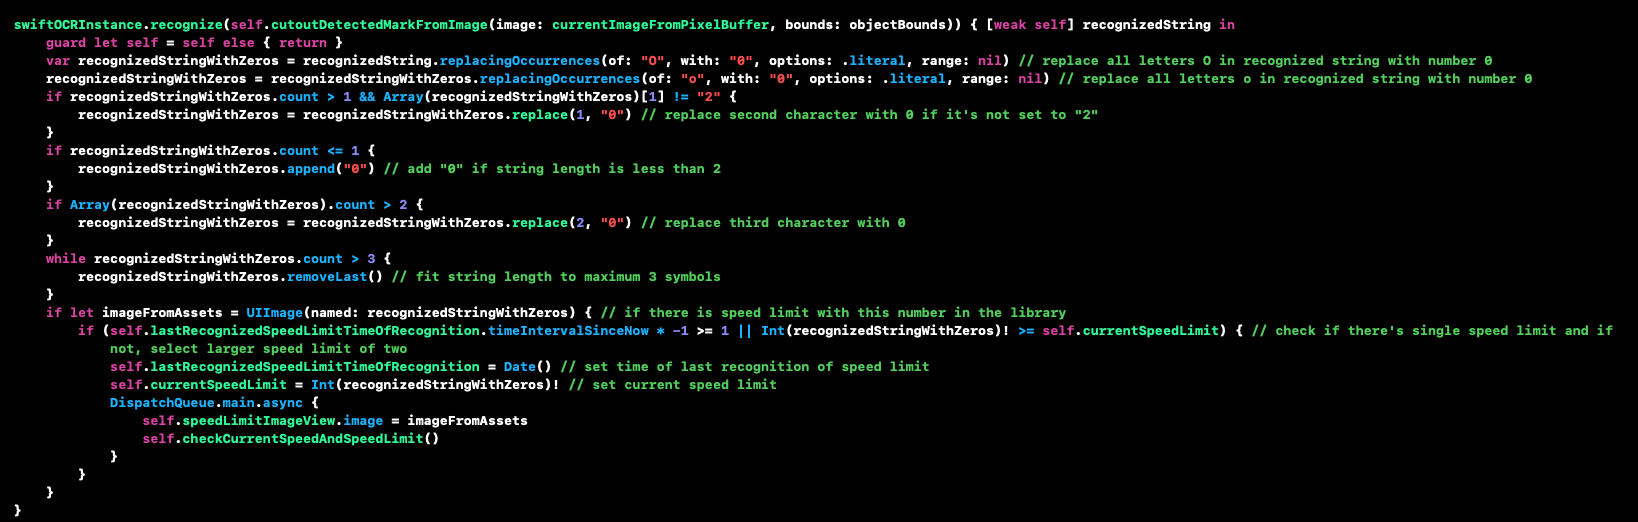
When we detect a speed limit sign, we cut out this particular image area and pass it to the SwiftOCR framework. Then we process the string that we get from it. Sometimes it takes letter O for a number 0, so we need to replace O for 0, sometimes it doesn’t recognize 0 at all, so we add it to the end of the speed limit number. This processing is made due to some errors of SwiftOCR, and it improves the quality of its work for our case a lot.
Conclusion
At the end of the day, we have an app that detects different road signs, shows it on the dashboard, keeps track of current speed and speed limits, and notifies the driver should he exceed it. A decent real-world computer vision solution, isn’t it?)
You can download the whole project from Github here.