Face Anonymizer
Editorial
Over the last decade, the computational power of GPUs and cloud services has drastically increased. Whilst early 2010s saw only governments and big corporations producing large amounts of data, over the last few years a paradigm shift may be observed with even small companies or startups being able to benefit from collecting and processing personal data.
As a result, a lot of companies store personal sensitive data in an insecure way. Hence new legislative initiatives, such as GDPR (The General Data Protection Regulation is a regulation in EU law on data protection), arise. The main goal of these laws is to write black-and-white rules on how companies should process the data and not violate human rights and freedom. To anonymize personal data is the principal tool to maintain businesses to benefit from processing personal data on the one hand, and protect sensitive data of a particular customer from unauthorized access on the other hand.
Tutorial overview
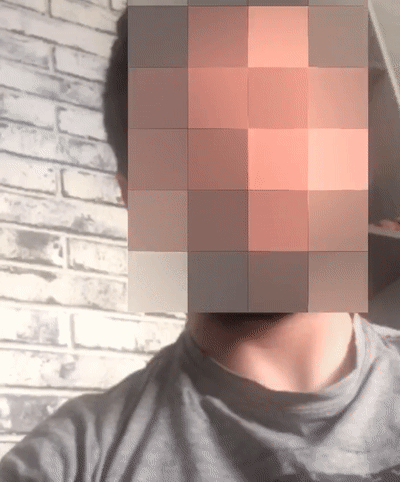
In this tutorial, you can learn how to anonymize one of the most sensitive data types -- a person's face. We will train a CoreML Object Detection model that detects human faces from a free MakeML's dataset, that you can find here. Blurred squares are to be applied onto the face area afterward, or, in other words, we will anonymize the data.
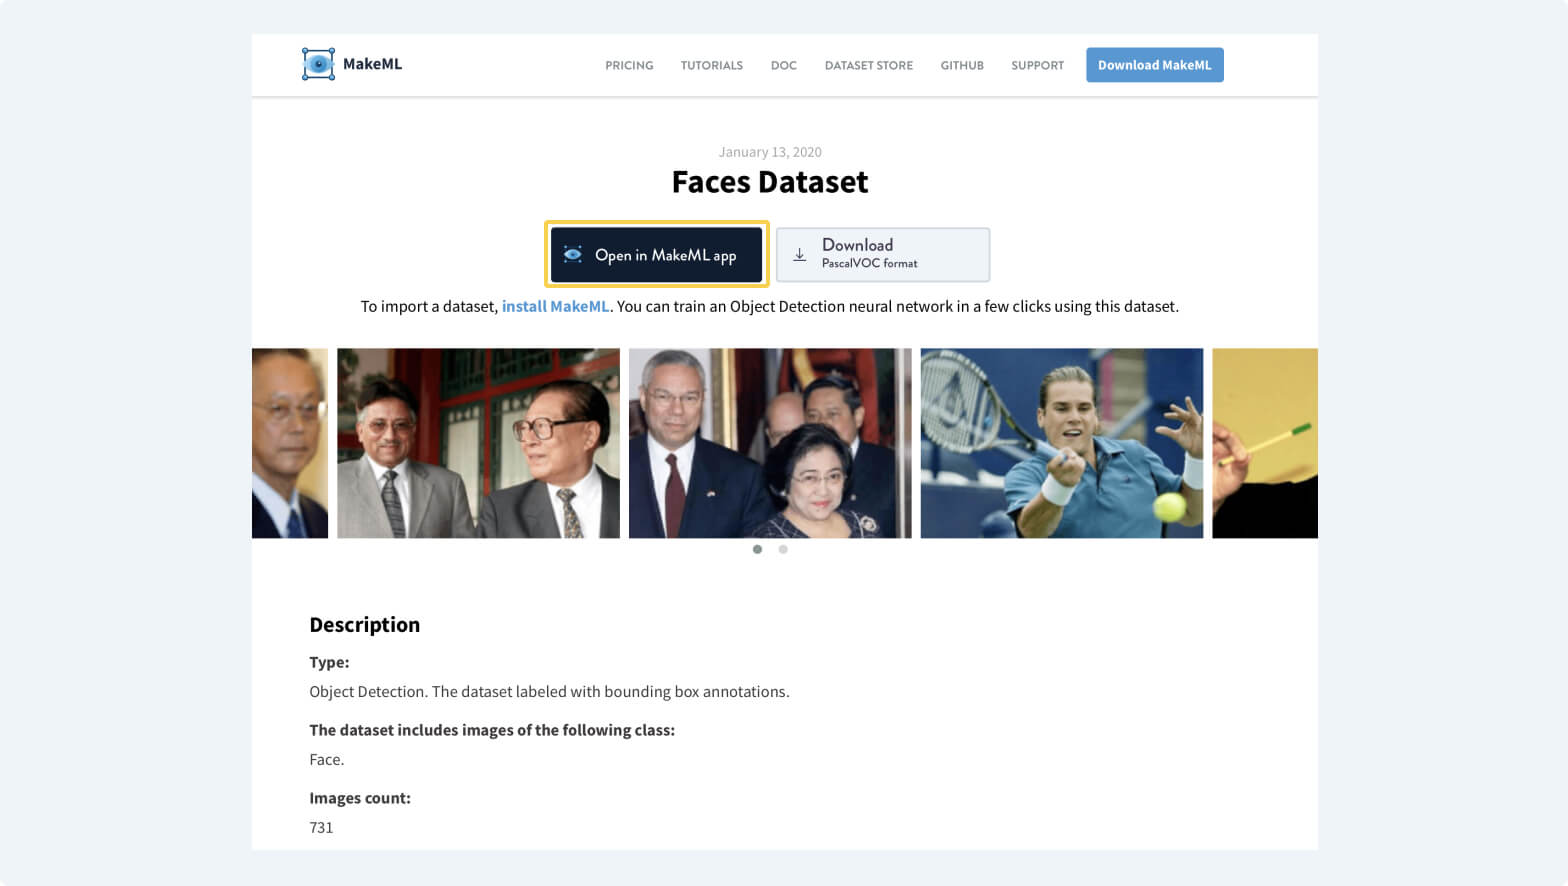
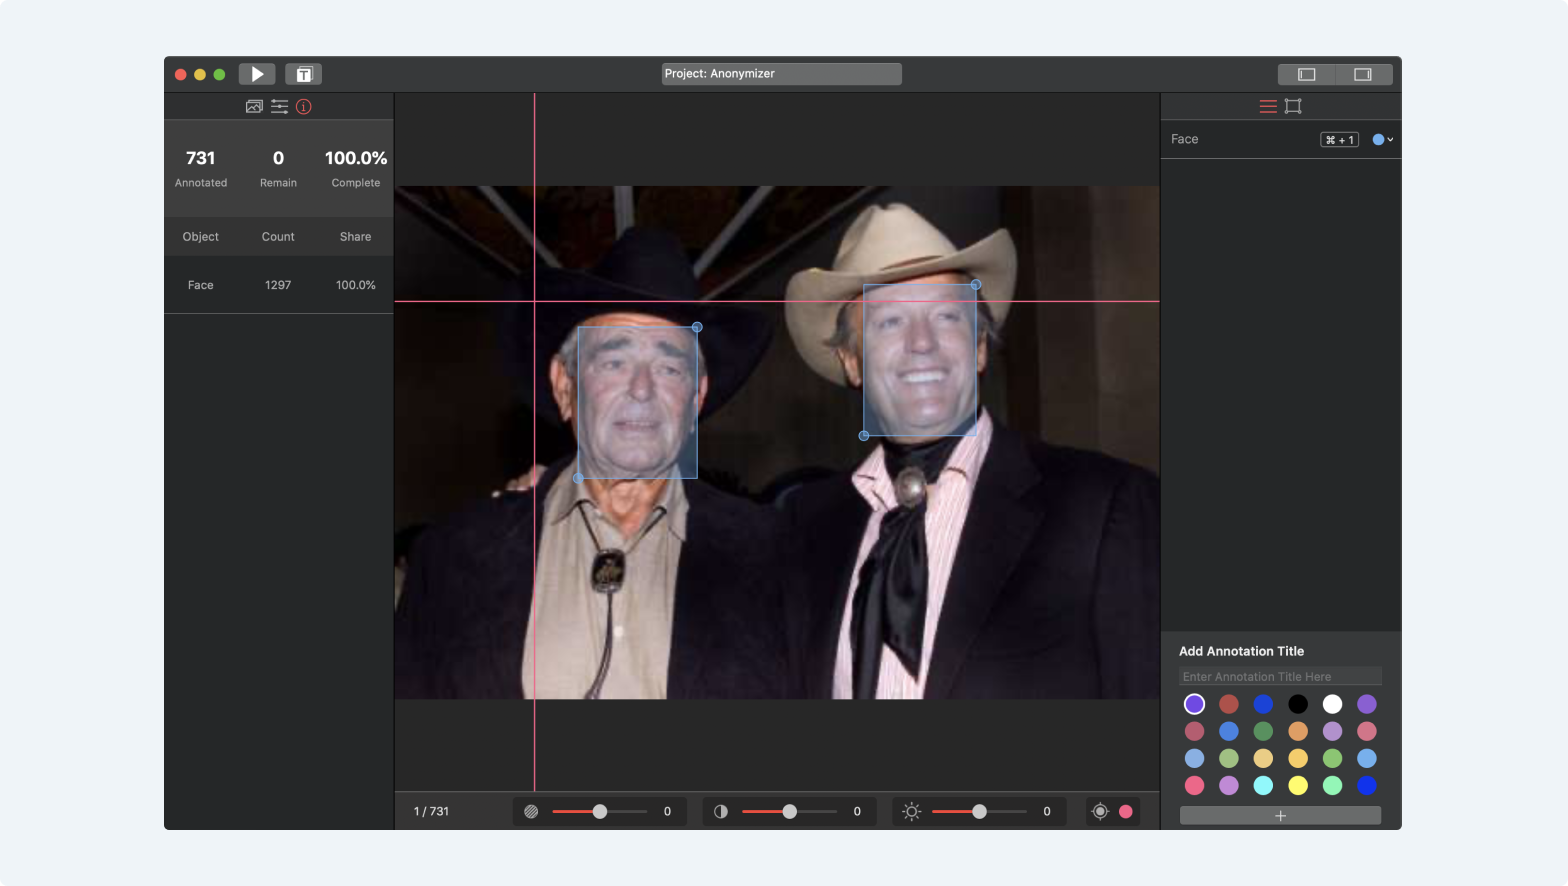
Faces Dataset
To save time, we have prepared a free faces dataset, containing 731 images with bounding boxes, and published it on MakeML Dataset Store. To create a project, all you need to do is to press "Open in MakeML app" button here.
 When the MakeML app is opened, enter the name of the project and press "Create."
Model Training
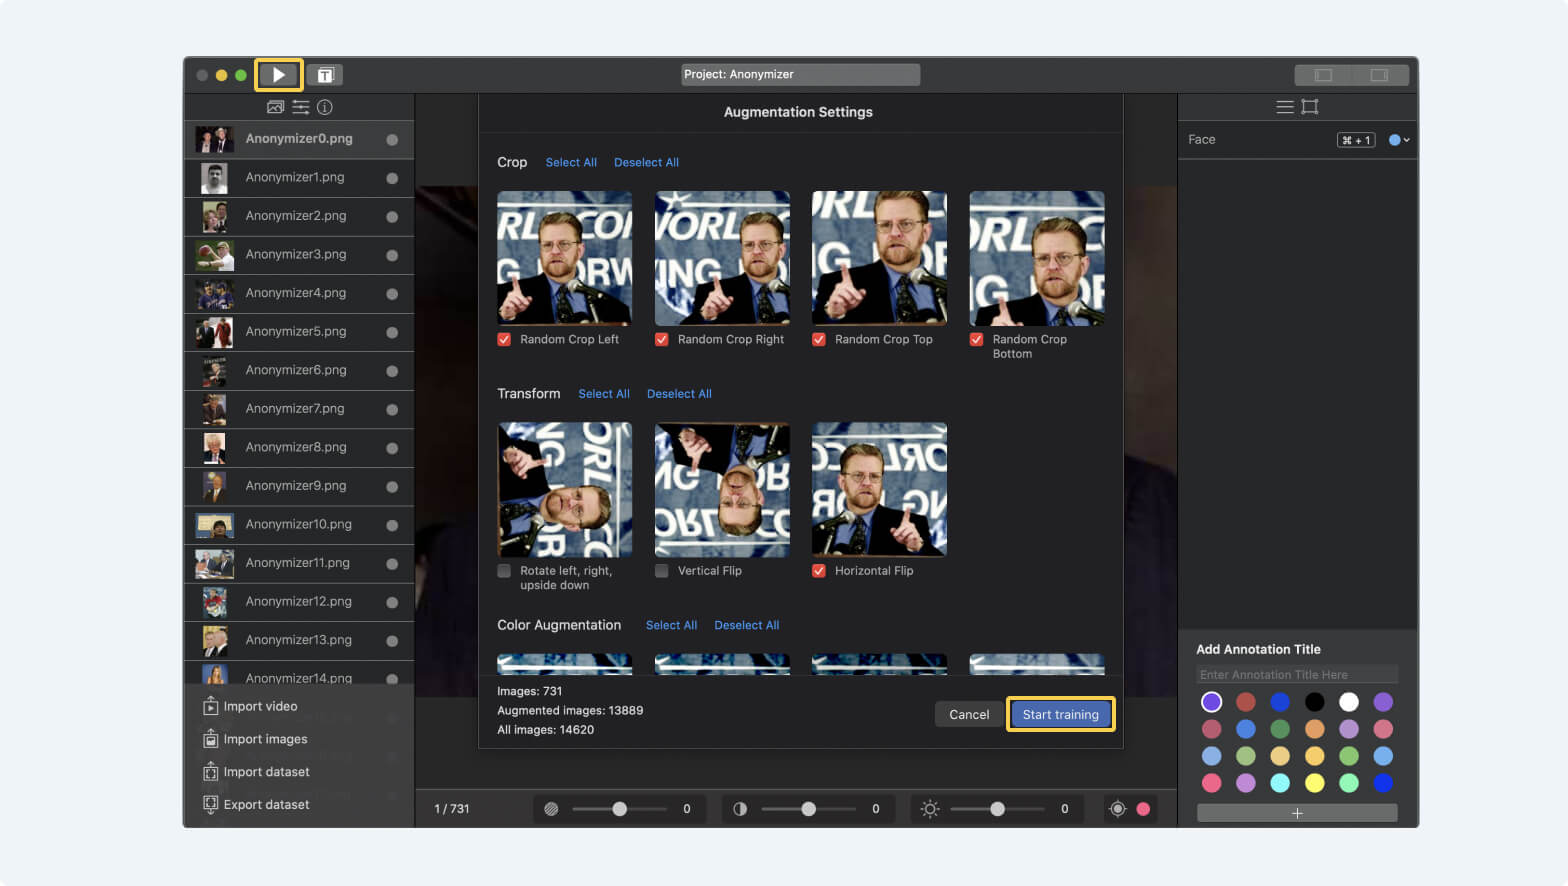
To start training the model, press the train button in the top left corner.
The next step is to select augmentation parameters for the model. The best model accuracy I achieved was with enabled "Random Crop Left," "Random Crop Right," "Random Crop Bottom," "Random Crop Top," "Random Crop Top," "Horizontal Flip," and "Brightness +" augmentation parameters. Having selected them, press the "Start Training" button.
To proceed with the tutorial, you need to export the model.
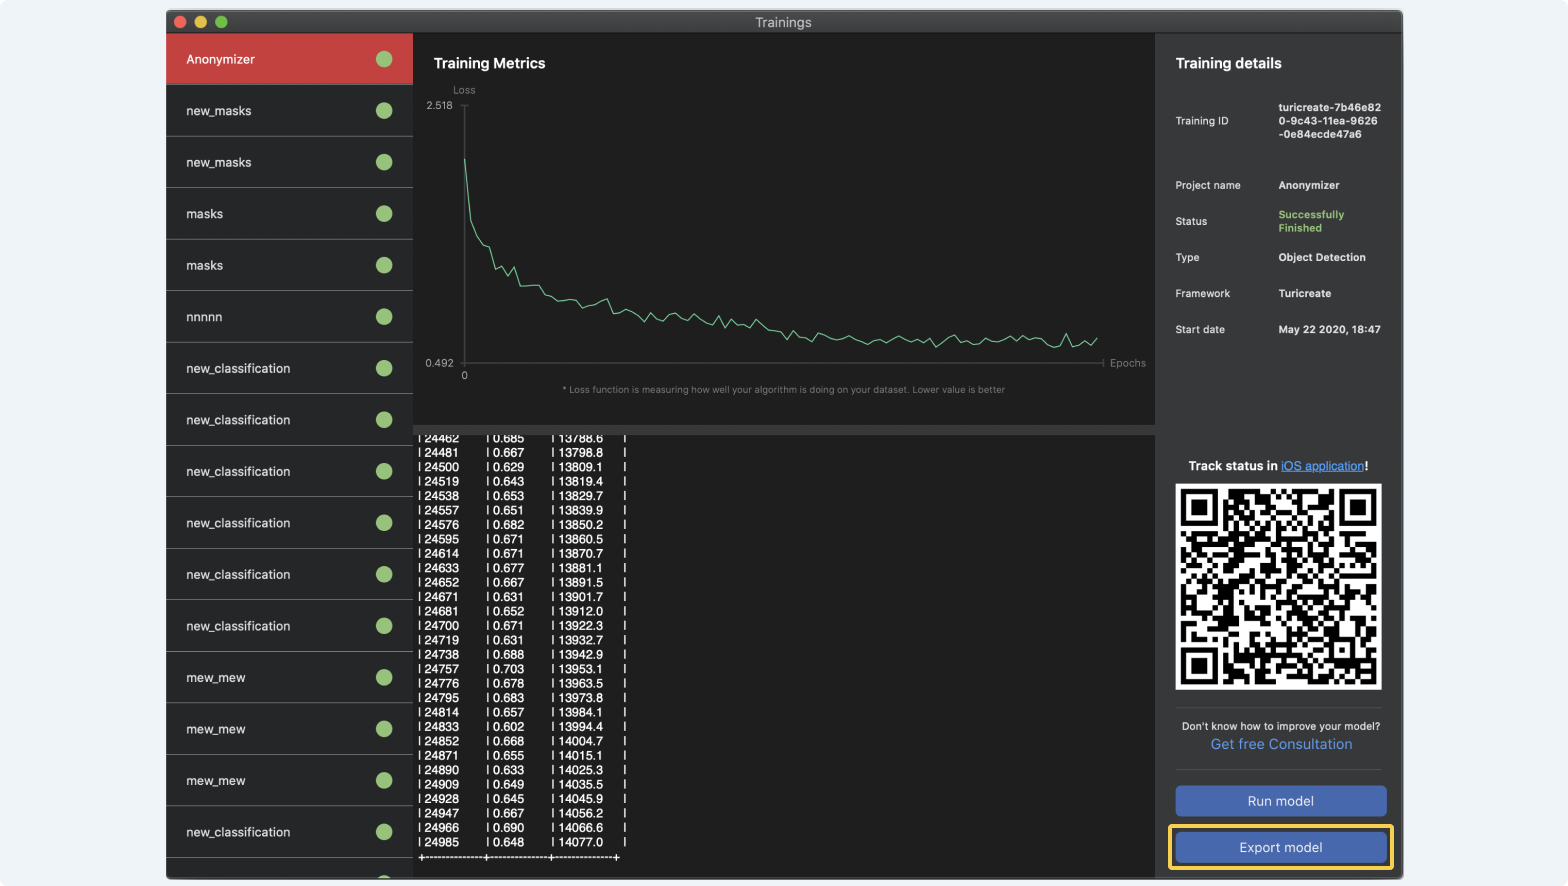
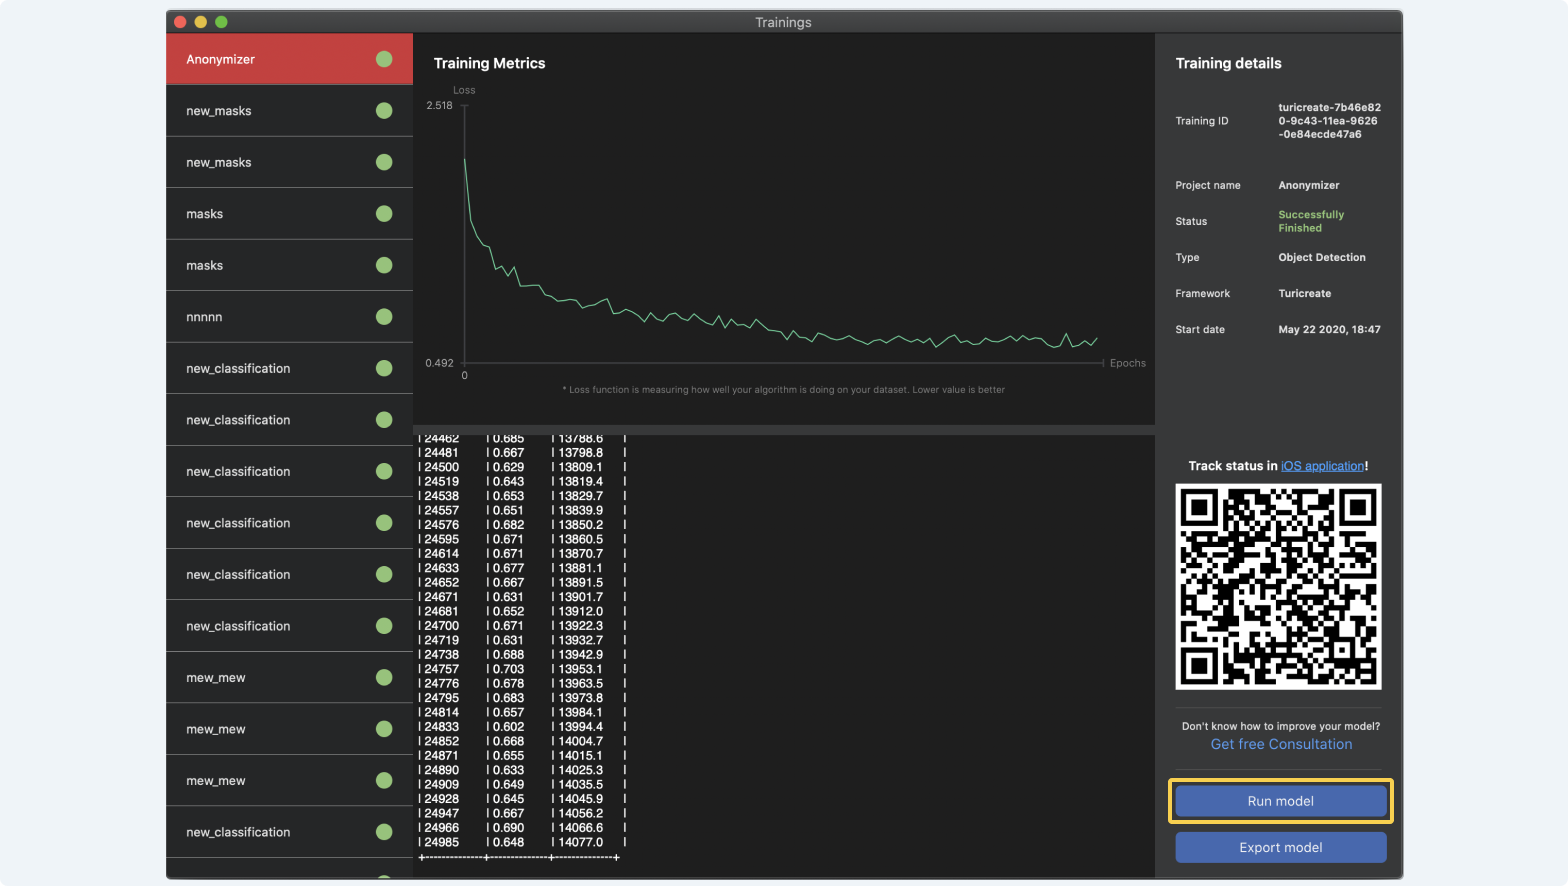
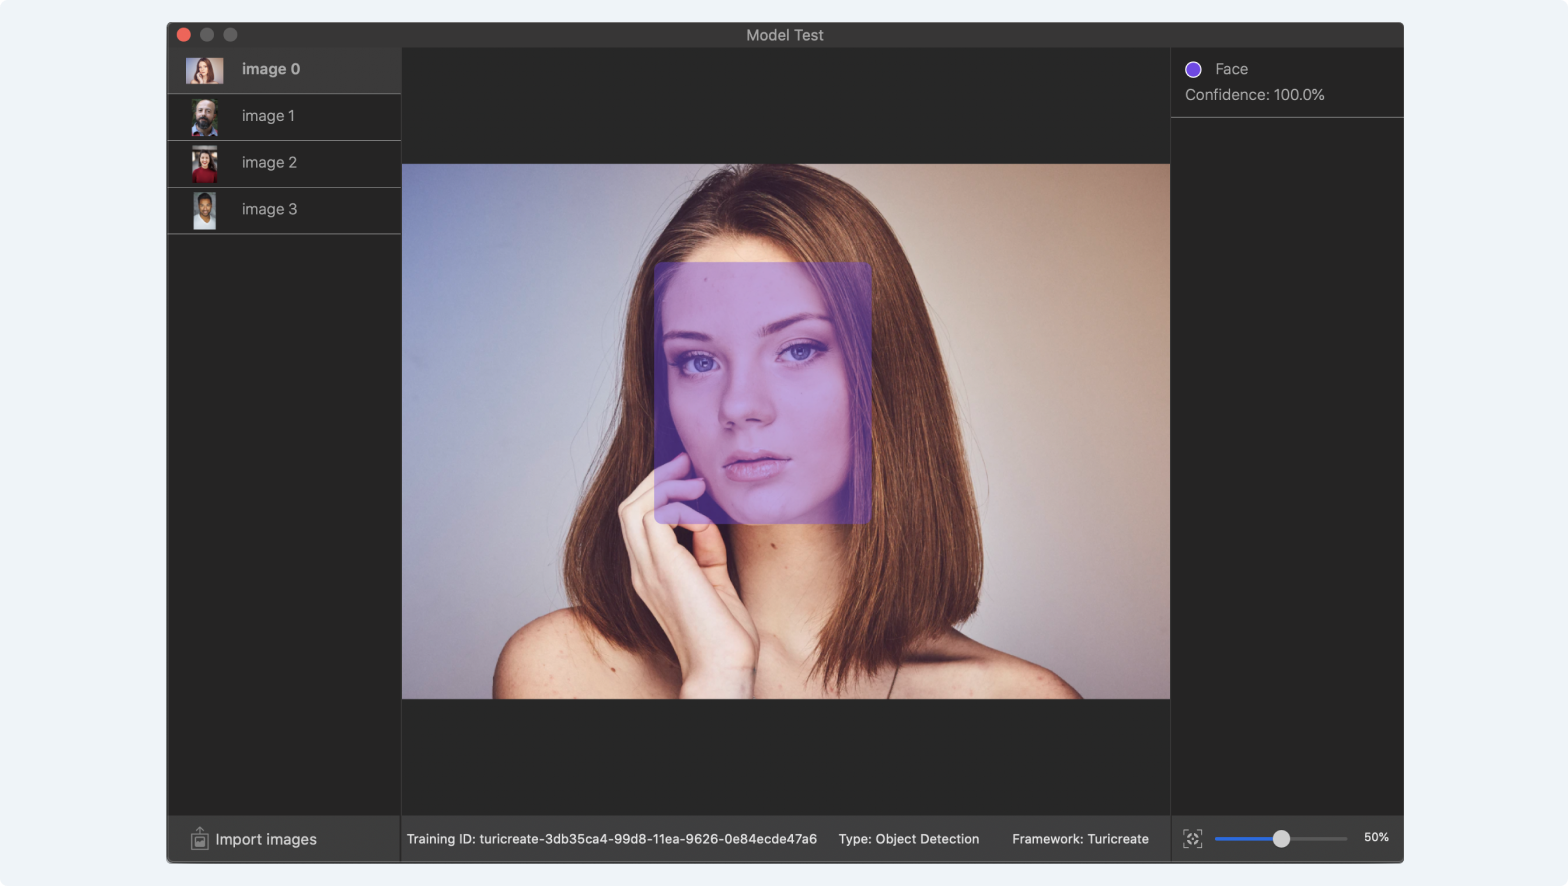
After the training, you can test a model by pressing the "Run Model" button and importing your images there. I have received a model with 0.648 loss.
Model Integration
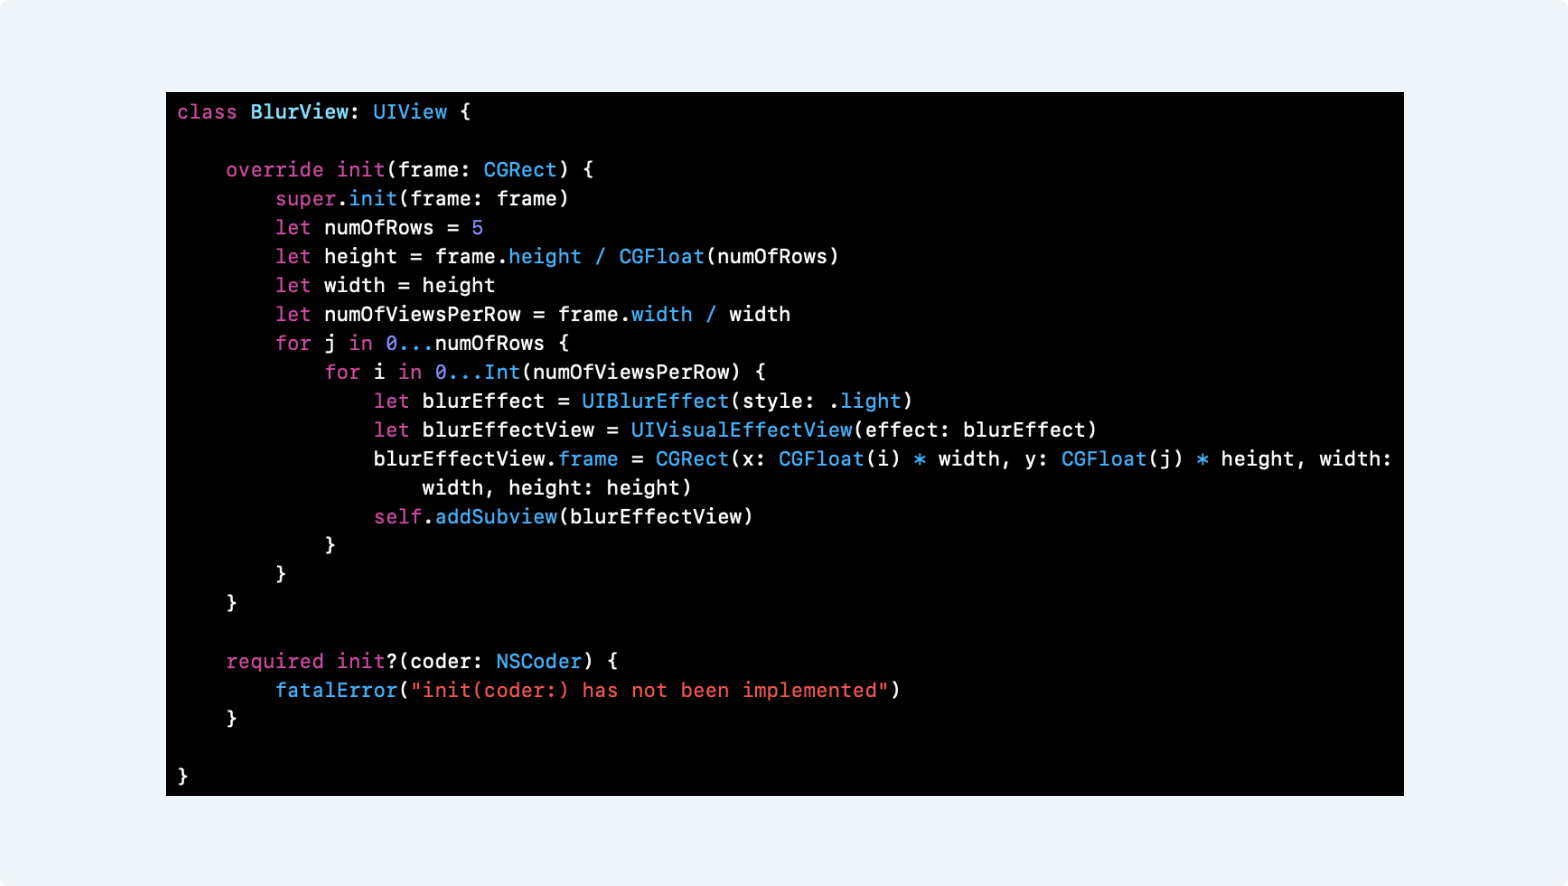
We have published a complete project on GitHub that you can download and replace our model with yours. I would like to elaborate on a blurred rectangles effect creation in particular.
The blurring code is to be found here. First of all, we are removing all subviews from the main view every frame when the model has new predictions. Given that the prediction qualifies our accuracy threshold (in our case, its 0.8 or 80%), we draw a blur view overlay. You can also see that we don't use precise bounds values from our model. We have made some adjustments to the size of our BlurView to make it look more attractive.
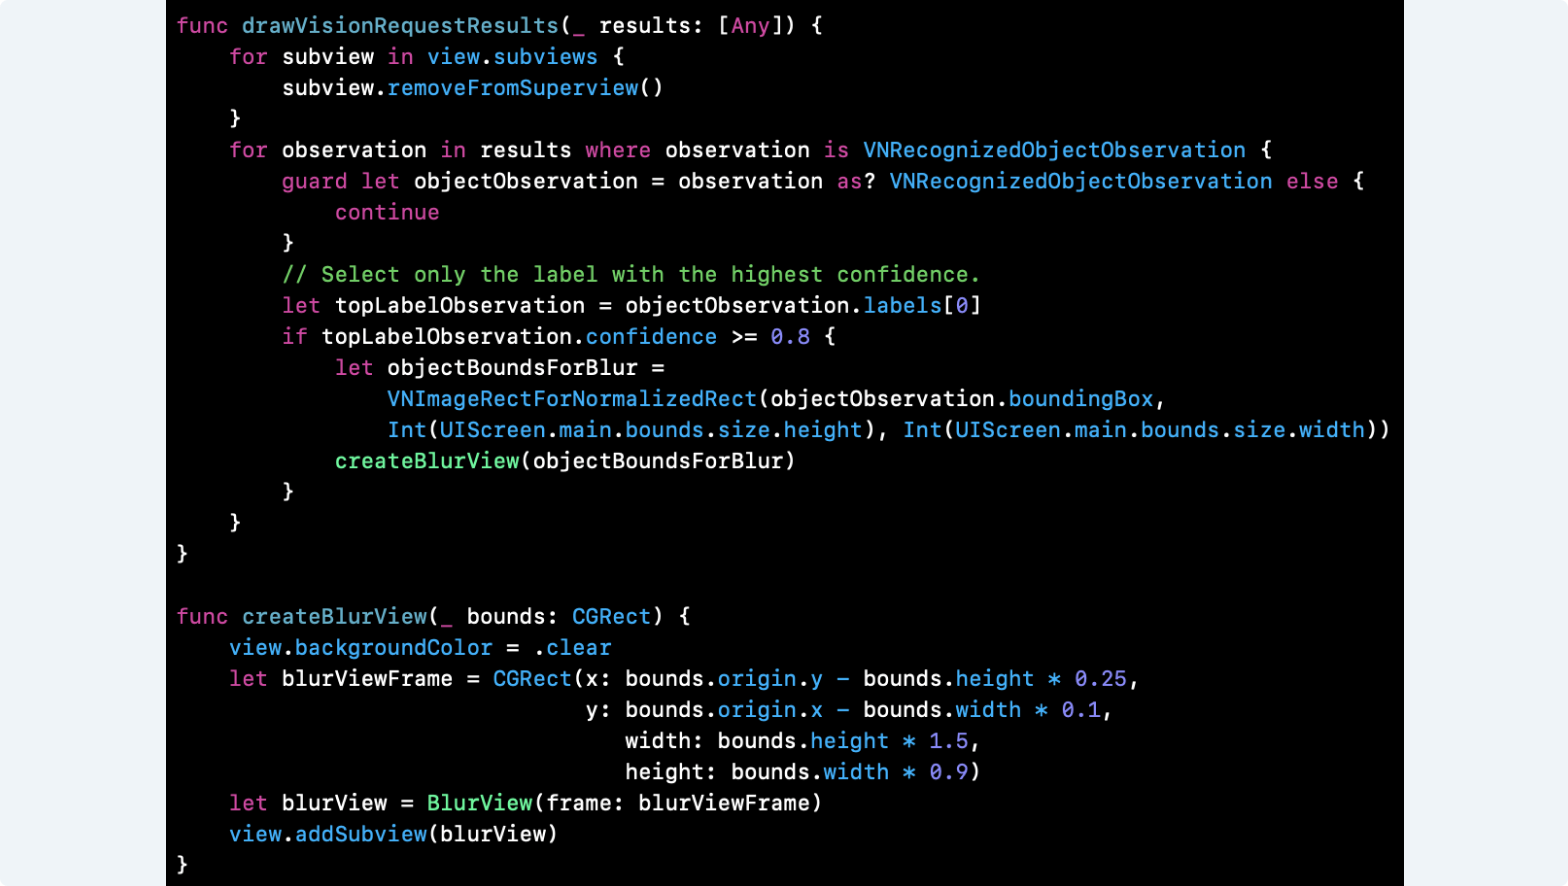
And we have added a separate class called "BlurView" to draw our good-looking overlays. We have a view that creates a table of 5 rows of squares that are UIVisualEffectViews with UIBlurEffect(style: .light). We always have five rows, and the size of the square depends on it.