Postage Stamps Tutorial
Editorial
When it comes to creating a neural network for the mobile app, there are three significant bottlenecks: Data collection and preparation, Setup and Training of the model, and Integration of a model to your app.

In this tutorial, we show you how MakeML helps to tackle the first one. We are going to use MakeML's Video Annotation Tool that will help us to create an annotated Object Detection dataset of 500 images in less than 5 minutes.
Tutorial Overview
A friend of mine once said to me that he had found a couple of postage stamps in his friend's collection, that costs 7000$. He asked me if we can create an app that detects expensive postage stamps.
This proposal was just an idea for an app, lots of which appears in every long conversation of tech-savvy people. However, I have seen an excellent opportunity in this proposal to show off how MakeML's Video Annotation Tool can be utilized.
Our example app was made using 1 short videos of a postage stamp. Here is an app that I've created the same evening that this app idea was told to me:
Note: Our model has obvious limitations. We have added only one stamps type in our dataset. That's why it detects only this postage stamp. Also, it makes it better in the same lighting conditions in which the annotation video has been taken.
Creating Dataset: Images Preparation
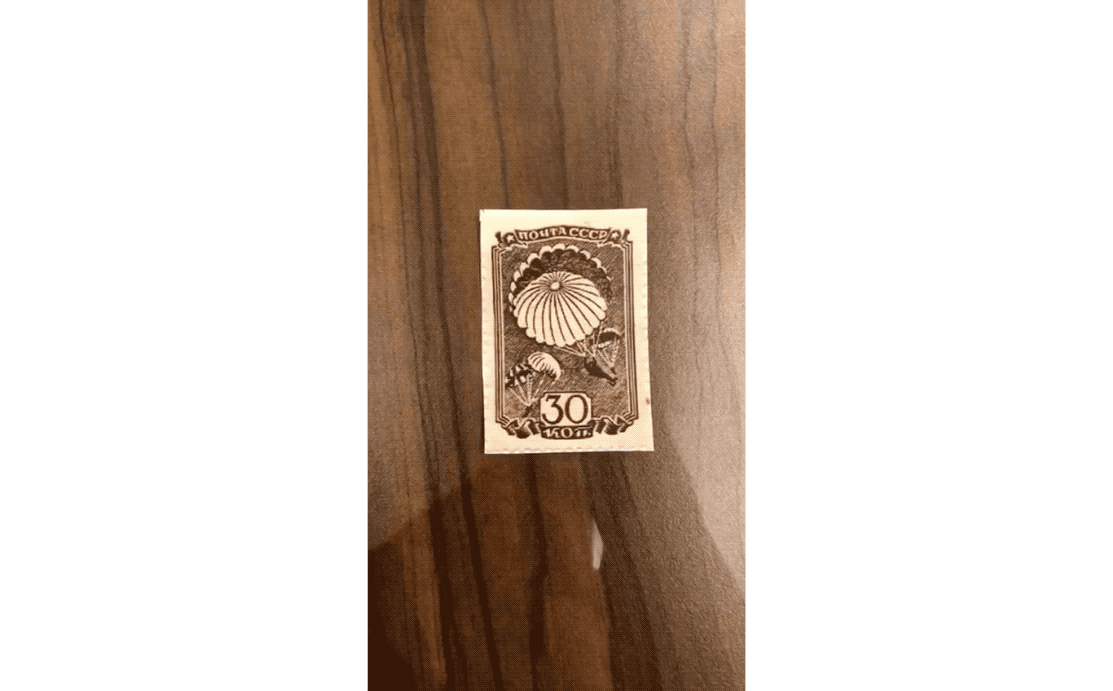
Because I don't have any expensive postage stamps in my possession, I googled "Most valuable stamps" and have downloaded an image of one very valuable stamp. Then I have printed it out. As a result, I have a fake valuable stamp, which I think will be enough for our example purposes. This step was the most time-consuming in the whole tutorial :)
As we know, we need many images to create a dataset using which we can train a neural network. Actually, in this example, we didn't prepare any images. I had shot one small video with this fake rare postage stamp. Here are this video:
In a few minutes, we will get around 150 annotated images from this video. A video, that I had taken has 24 frames per second. It means that we can extract around 150 images from 6 seconds. In the next chapter of this tutorial, we will show you how you can do this.
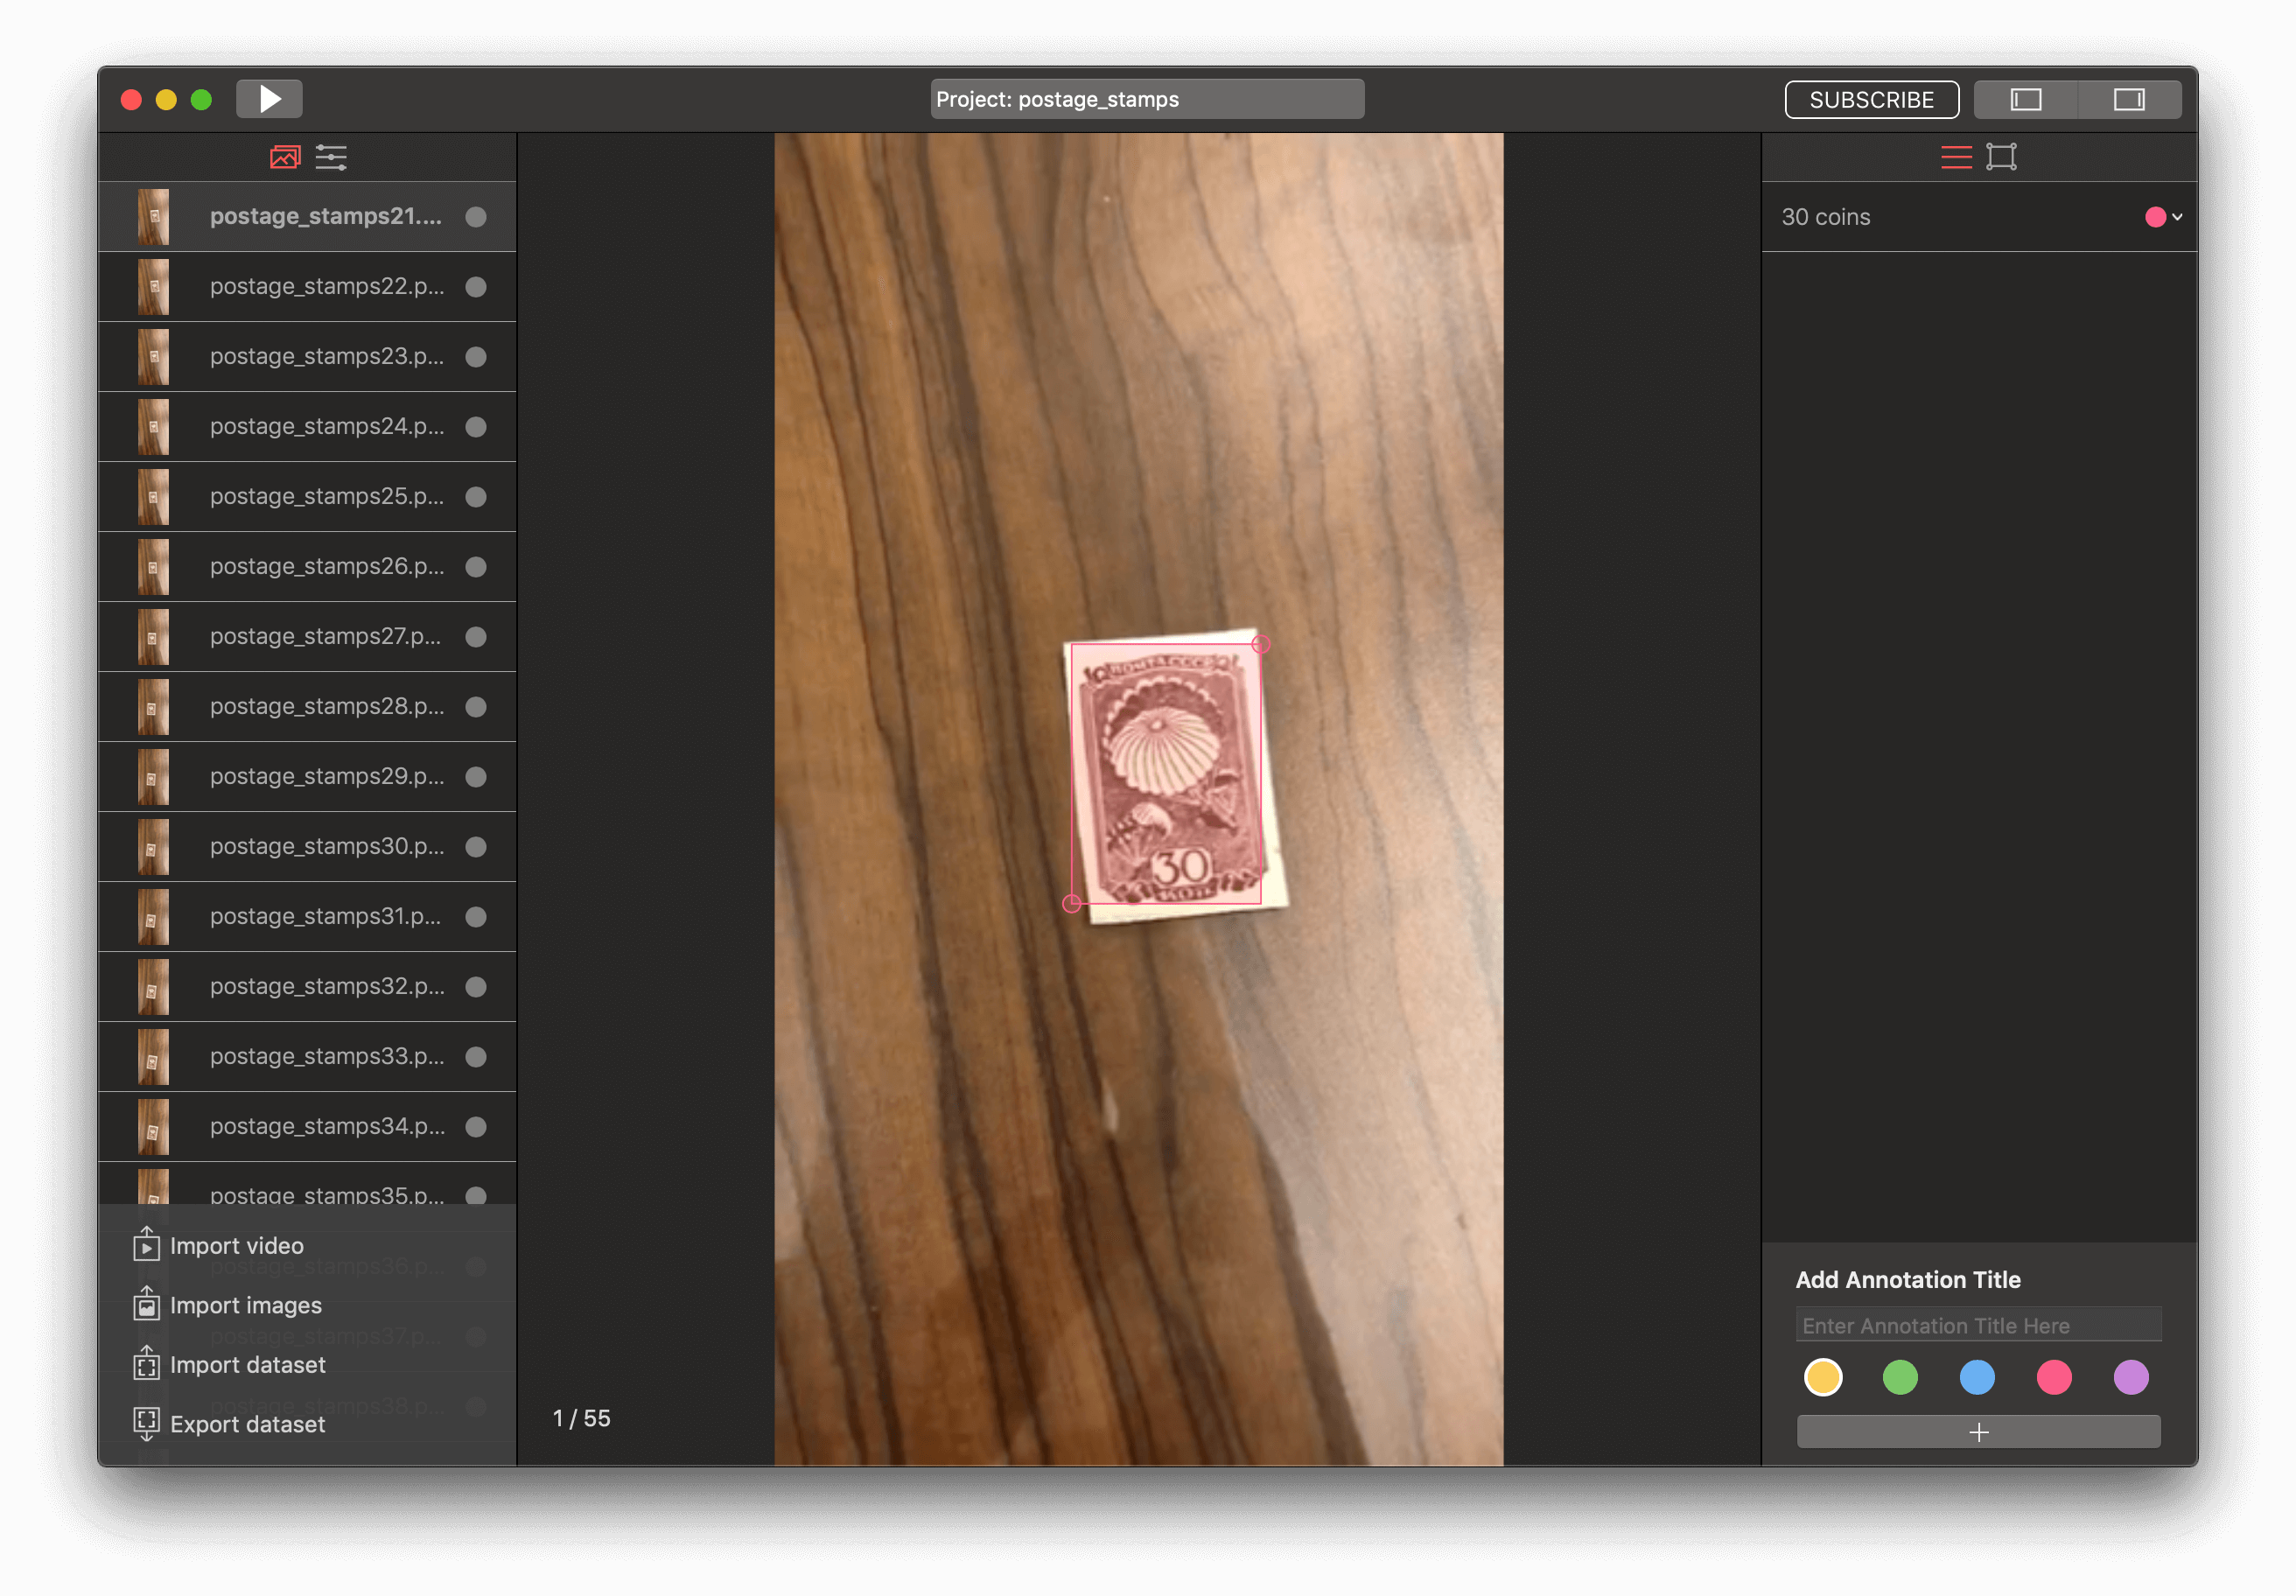
Creating Dataset: Images Markup
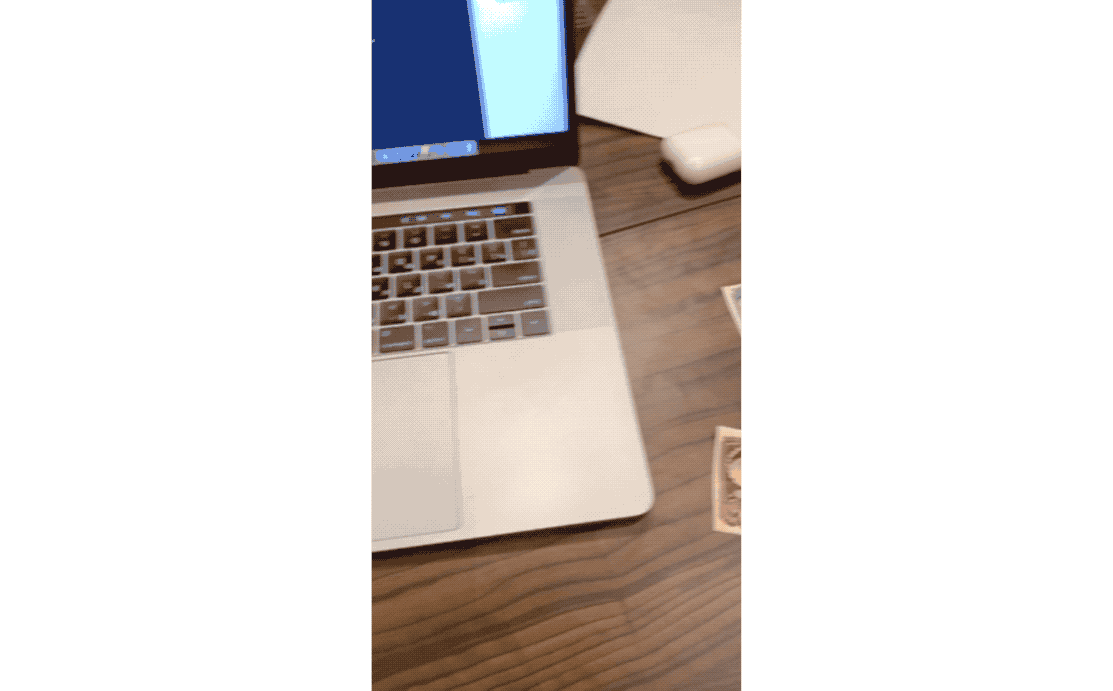
It took me around 5 minutes to capture the videos and to send them from my iPhone to my Mac. From this point, we need to markup them. To do this, we'll use MakeML app:
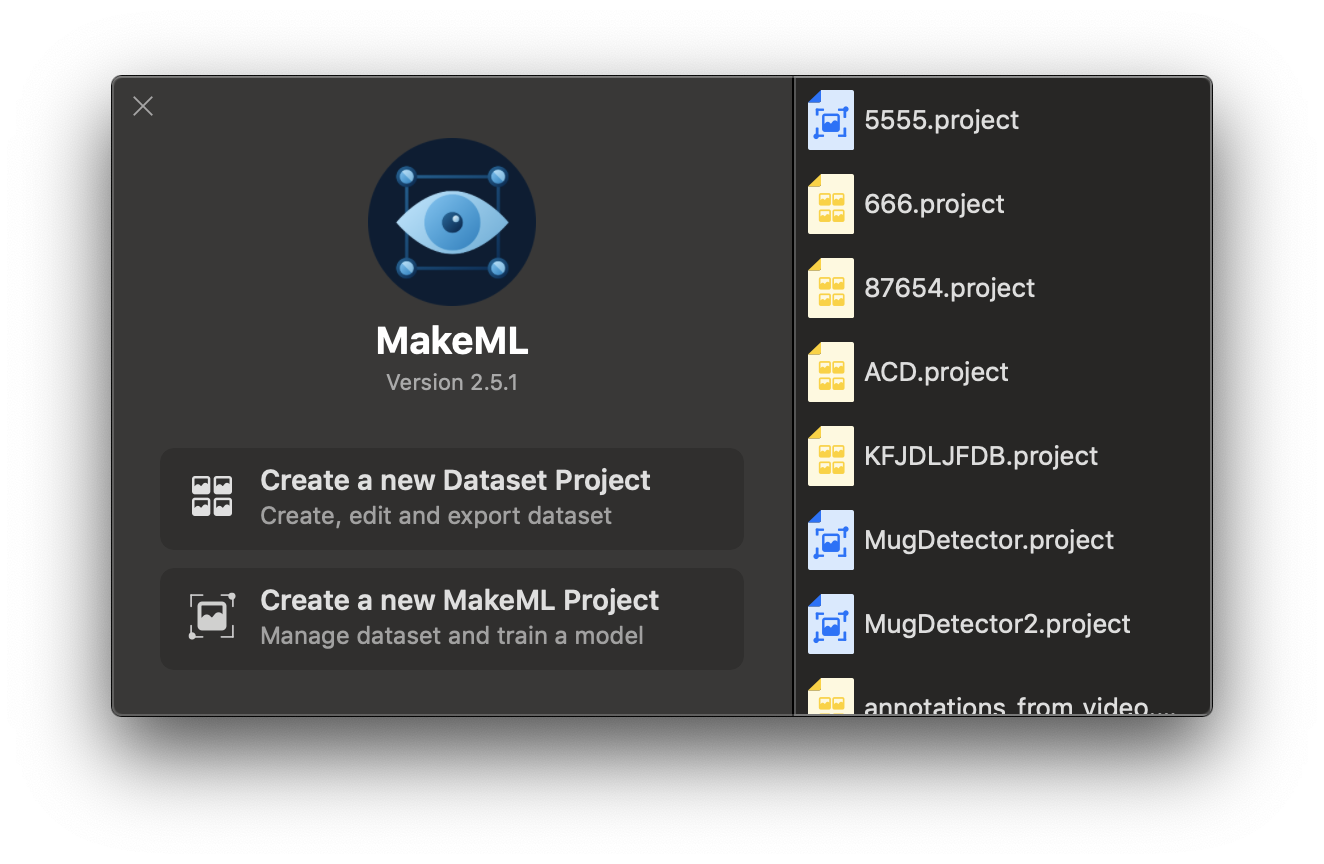
- Open MakeML app and create a new MakeML project.
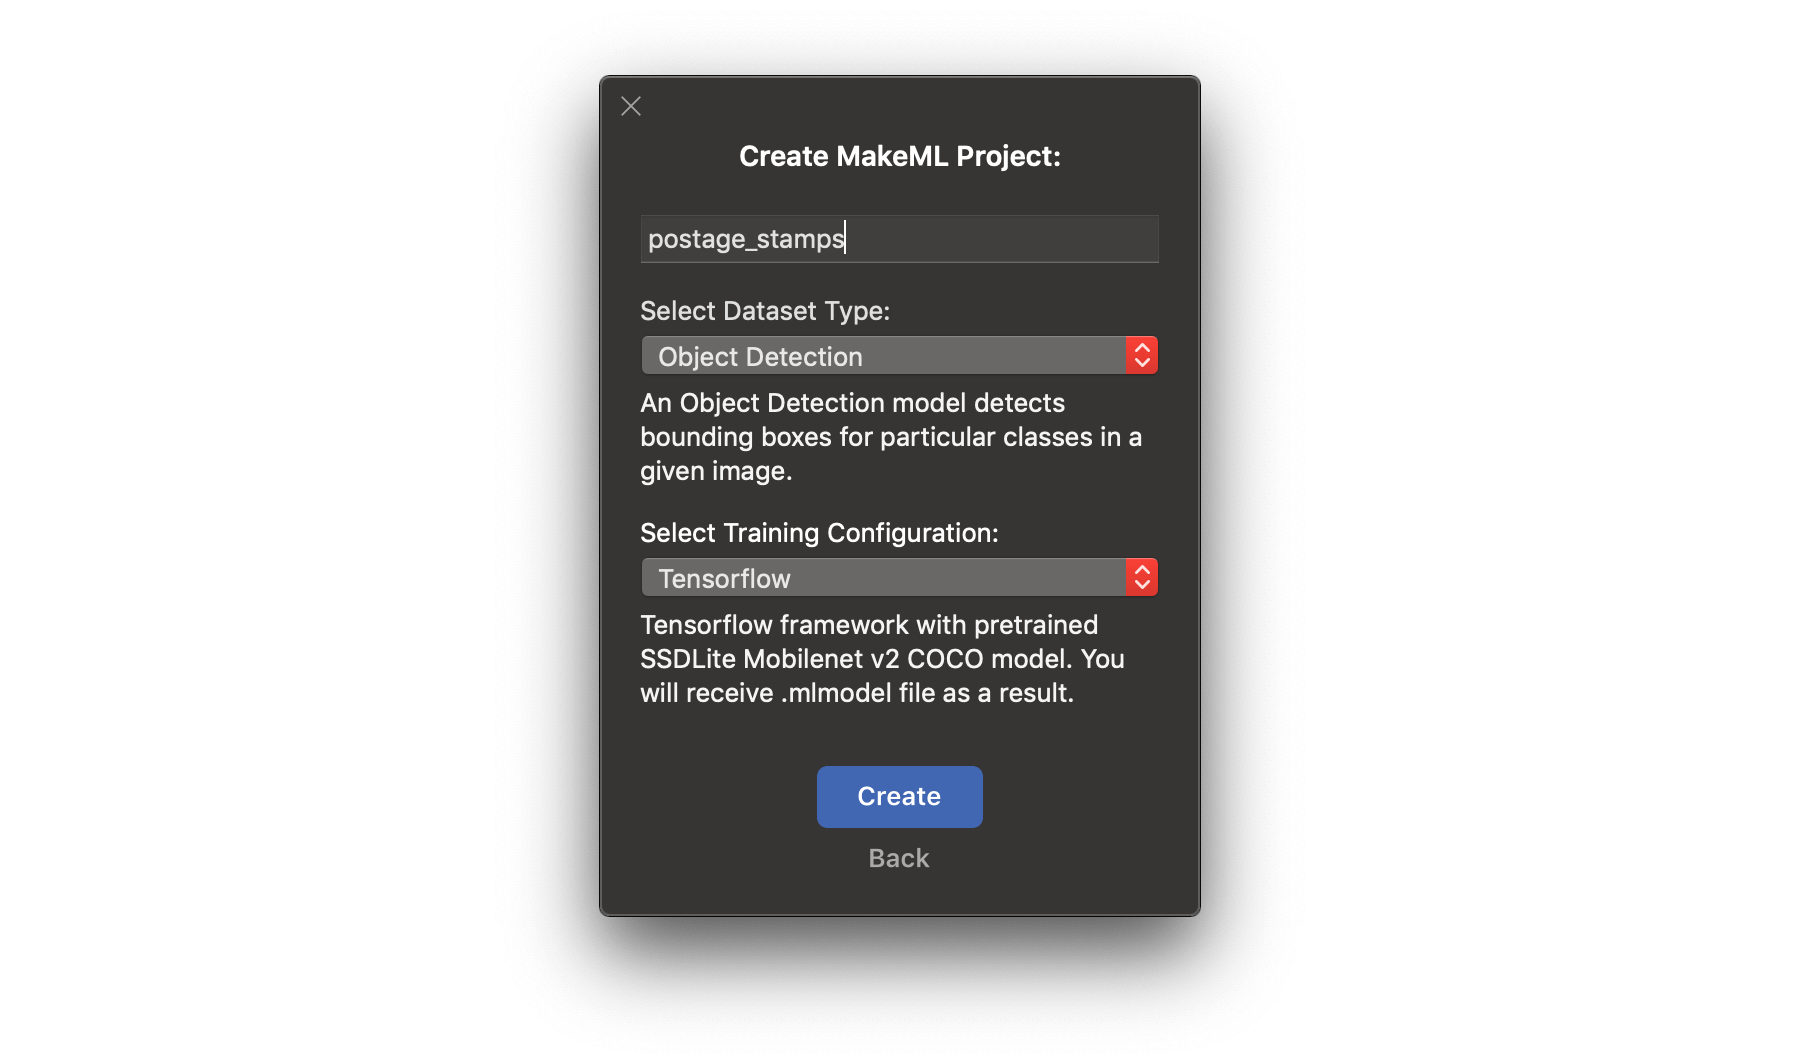
- Select Object Detection dataset type and Tensorflow training configuration, enter a project name, and press the "Create" button.
- Press the "Import Video" button and select a video that you have captured before.
- To annotate our stamp, we need to tap and drag over it on the first frame, enter the annotation title (they merge if you already have this annotation title in your project), press ok, set the number of images per frame, and press the import button. The object tracking algorithm will track the object on the video and will automatically add annotated images to your dataset.

In the postage stamps project, I had set training configuration parameters as follows:
- Batch size - 24
- Number of iterations - 3000
To start our training, we need to press the "Run" button.
Training
After you have pressed the "Run" button, the dataset uploads to MakeML servers and training of the model starts. You just need to wait until your model is ready. The parameter you can monitor at training screen is Loss. I have explained what this parameter means a bit deeper in the Nails tutorial.
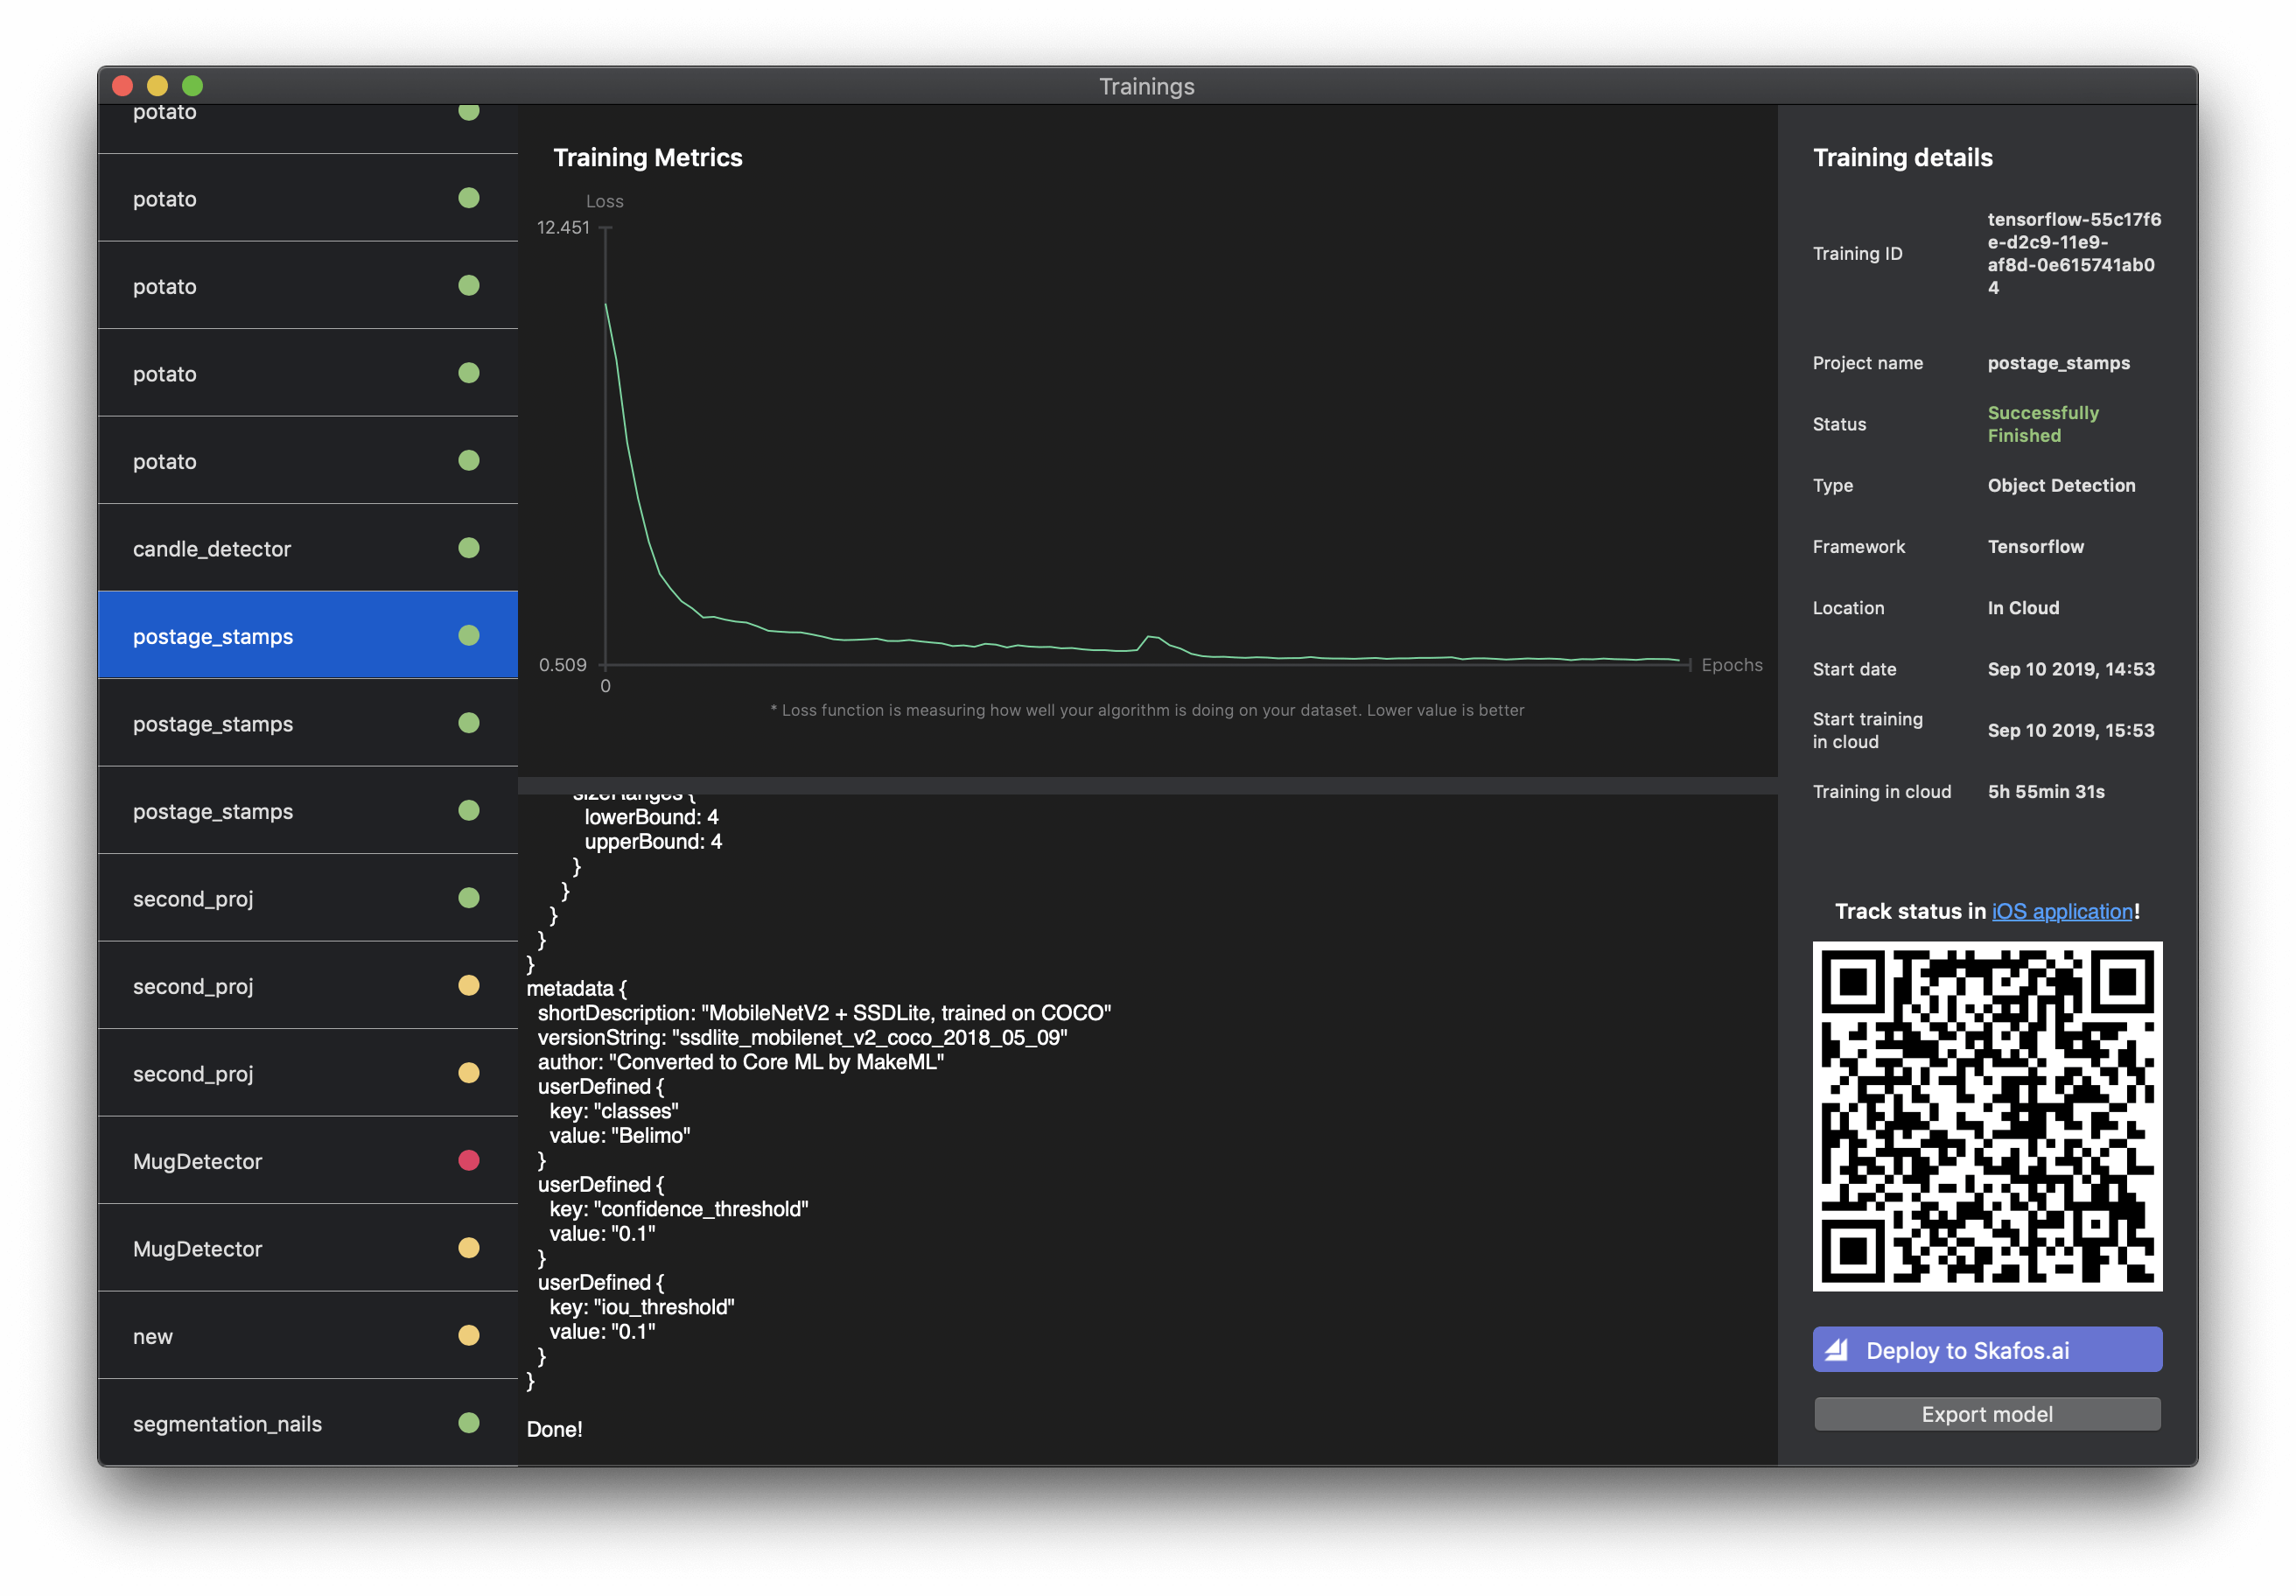
When the training of the model is finished, you can export it and receive a .coreml file, which is ready for integrating into your iOS app. All you need is to press the "Export model" button.
Integration of model with iOS app
Integration of the model with iOS app is the final step of this tutorial. After exporting the model, you will receive a package. We need model.mlmodel file from this package.
We have prepared a project in which you can easily run and test your CoreML Object Detection models. You can download it from Github.

You need to open the project, drag-and-drop your "model.mlmodel" to it. Then change the modelURL variable in "ObjectDetectionViewController.swift" with "model.mlmodel". That's it, you are ready to go and search for expensive postage stamps!